Table of Contents
![]()
Data Input and Manipulation in the JACQ System
Login with your personalized user account herbarium.botanik.univie.ac.at/herbarium-wu/login.php
The menu appears and shows buttons according to your group privileges.
| menu buttons |
| Taxonomy / Chorology |
| Literature |
| Specimens / Observations |
| Images |
| Nomenclature |
| Labels |
| Import |
| edit Users / edit Groups |
| change password |
Taxonomy
Taxon search
Choose Taxonomy in the main Menu to open the List Species window:


The List Species window is used to search for taxa. You can search for a given Family, a Genus or Species by using the corresponding fields, whilst for other taxonomic levels (e. g. tribe, subspecies) the relevant category needs to be selected from the drop-down list under Rank. You can also limit the search results to accepted names, synonyms, illegitimate names and a variety of other taxonomic status with the drop-down list under Status.
By combining search terms with wildcards, it is possible to generate taxon lists. For instance, to search for all species of Jurinea, type Jurinea in Genus and the wildcard % in Species or, alternatively, choose “everything” in Status. Note that by just leaving Species and Status blank, only the entry containing genus Jurinea will be returned in the search. To search for all accepted names by Boissier at the species level in the genus Carduus, type Carduus in Genus, the wildcard % in Species, select acc. in Status, species in Rank and type Boiss. in Author.

Further combinations are possible. For instance, you can search for all Carduus species starting or ending in “s” by typing s% or %s, in Species.
Note: Searches producing more than 1000 hits cannot be displayed.
Editing an existing taxon
By clicking a taxon in a search the edit Species window is accessed. Here the different attributes of the selected taxon (status, literature citation, synonyms, etc.) can be entered or modified. In the following section we will review the possibilities of edit Species using Pinus abies L. as an example.

By clicking Pinus abies in the list Species search page, we access the edit Species window for that entry.

After a brief look at the Plant List, we discover that Pinus abies L. is a synonym of Picea abies (L.) H. Karst., so some editing is needed. To enter the editing mode, press the Edit button at the bottom of the page. As a result, the taxonID field is displayed in light green.

Click the drop-down list tax. Status and select syn.

Input Picea abies (L.) H. Karst. in the field accepted Taxon. This field is auto-completing and typing “pic ab” automatically displays the option Picea abies (L.) H. Karst. on your screen. You just need to click it to fill in the box. If no suggestions are displayed, the taxon is not yet in the database and you will need to enter it (see next section).

Now you need to input the reference for the accepted taxon. Click accepted Taxon and the window list Synonyms will open.

Click add new Line and the window edit Synonymy opens.

Input the available information. In field acc. taxon type Picea abies and in source, select service and then the name of the online database where you checked, for instance The Plant List (K and MO) and the date in Ref Date.
Note: The Plant List is a compilation of several data sets, such as ILDIS (Leguminosae), WCSP (World Checklist of Selected Plant Species), TICA (Global Compositae Checklist) or TROPICOS. The source of any entered taxon is given in The Plant List. Usually such taxonomic data lists should be entered in the field source (service) but you should check if the status is still correct (e.g. search for a taxon of Leguminosae in ILDIS). In special cases, status information is given in The Plant List before the original data set is officially online (e.g. “WCSP (in review)”). As a result, you will not find such a taxon name in WSCP and this taxon should be linked to The Plant List in the field source. Additionally the short information “WCSP (in review)” can be copied in the field annotations.
Alternatively, you can use person, if the synonymy is unpublished and for instance provided by a reviser on a herbarium label. If a literature reference is available, then select literature and type the name of the author and also e.g. the year to reduce the provided list of references. If you cannot find your reference among them, you will need to input the reference (see the Literature section for further details).

Once finished, click the button Update to save changes.
Note: You can add multiple synonymys to show the revision history of the taxa, making sure the most recent one is selected in the edit Species window.
Adding a literature reference
Back in the edit Species page you can add literature references by clicking edit Index which opens the list Index window.

Then click add new Line (for further details refer to Literature).
Note: In some cases it might be necessary to enter two literature references.
Example 1: A name is validly published on a herbarium label (see “schedae-publications” in structure of literature) and later published in a journal; add both the label and the journal, as journals tend to be more widely accessible than the label.
Example 2: A name is published in 2 different publications and it is impossible to know which came first i.e. both were published the same year but the month is not specified. If the 2 articles are found in the same journal, assume that the one that comes first is published earlier.
Adding the type and protologue information
Back to the edit Species window, it is also possible to include types and protologues. Clicking edit Type, opens the window list Type.

By clicking add new Line you open the edit Type window, which should be filled in with the information extracted from the original publication (protologue). The field annotations should contain the indicatio locotypica. Use quotation marks for the original text of the protologue. You can use square brackets to add relevant information (like [nom. nud.]; or to add the collector, collection date etc. if it is not mentioned in the protologue but elsewhere in the text) or to omit irrelevant parts (for instance morphological descriptions […]).

You can check the changes in the edit Species form, after clicking Reload.

Linking a register with its basionym
Combinations and new names should always be linked with their basionyms. In the preceding example, Picea abies (L.) H. Karst. needs to be linked to its basionym, Pinus abies L. To access the edit Species form of Picea abies, click the Link button under its name in accepted Taxon. You can access the edit Species form of any taxon by filling the desired name in the accepted Taxon or Basionym fields (making sure you are not in editing mode). This will display a drop-down list where you can select the targeted name. Then by clicking enter on your keyboard the Link button will appear below the field. Click on it and the desired edit Species window will open.


Now enter the editing mode and type the basionym name Pinus abies L. in the field basionym.
Homotypic (nomenclatural) and heterotypic (taxonomic) synonyms
In order to check if the synonyms are correctly linked enter e. g. Ranunculus ficaria subsp. bulbifer (Marsden-J.) Lawalrée Willd. It is synonym of the accepted name Ficaria verna Huds. Now click on list synonyms and this window will open, where all the linked synonyms are listed below the accepted name: heterotypic synonyms – preceded by ”=” – and homotypic ones – preceded by “≡”.

Recommendation:
Adding annotation labels
If your specimen is the type for a later synonymized name, and the accepted name does not appear on the herbarium sheet, you will need to add an annotation label. Here you should include: (1) the information source (e.g. “fide TROPICOS” or “fide R. Govaerts & al. 2008. World checklist of Myrtaceae”); (2) the accepted name (e.g. ≡ Picea abies or = Picea abies, depending on whether the names are homotypic or heterotypic synonyms, respectively); and (3) the name and affiliation of the reviser, and the revision date (e. g. “annot. P. Escobar García (W) 2013-06”).
Note: Only add an annotation label for information that is completely different to that given on the herbarium sheet such as: type status, basionym, accepted name, author(s). If there is only a slight divergence i.e. a missing “ex …” in the authorship there is no need for a new label).
Entering new taxa from scratch
Before entering a new species, make sure the name is not yet in the database. Please note that there may already be homonyms with different authors in the database!
We will use the name Phonus rhiphaeus (Font Quer & Pau) G. López as an example.
From the main list Species window click on new entry, to open a blank data entry form. Check to see if the name has already been entered by typing it in the fields accepted Taxon or Basionym. A drop-down list will appear showing the most similar names to your input, in alphabetical order.

As you can see, Phonus rhiphaeus is not yet in the database. Start by typing Phonus in the field Genus, and selecting the appropriate name from the drop-down list.

Adding a new epithet
Then type rhiphaeus in the Species field. As you can see from the drop-down list, the epithet rhiphaeus is not yet in the database.

To enter a new epithet, click on the Species field and the window edit Epithet will open. Type the new epithet and click Insert. Now you can select your new epithet from the drop-down list in the Species field. Please be very careful with the spelling and always check new epithets in a standard work. Take care not to introduce blank spaces after the last letter if you copy and paste!

Adding a new author
Start typing the author “Font Quer &…”; the desired combination (Font Quer & Pau) G. López does not appear in the drop-down list so you need to input the new author combination in the database.

To add a new authorship click on the field Author to open th edit Author window. Type the new authorship in Author and click Insert. Now you can select it from the drop-down list. Abbreviations of author names generally follow Brummit & Powell (1992), and are available at the online database ipni.org. Note that only the clickable, underlined author names follow the standardized form. You can include them in our database after adding blank spaces after the initials (e. g. „B.Bremer“ should become „B. Bremer“). Before entering a new complex authorship check separately for the correct standard form of each author’s name. The field Author can be filled either with a complex authorship or a single author’s name. In the latter case, you have to fill the Brummit field with the complete name and further relevant information such as dates of birth and death.


Finish by adding other information, such as the Basionym, accepted Taxon, etc. Link the names to their basionyms as explained here.

If your specimen does not include the accepted name on the herbarium sheet, you will need to add it on a label. (see Taxonomy - Adding Annotations).
New entries by copying and editing an existing one
New entries can also be added by copying an existing one and then editing it. This option is useful when entering homonyms or infraspecific taxa that share some fields with entries already present in the database. In the following example we will input the name Eurybia rudis Benth. var. arguta Benth. using the existing entry Eurybia rudis Benth. as a template.
First, enter the Pinus abies L. edit Species form by searching in list Species or as already explained in the previous section.

Then click New & Copy at the bottom of the edit Species form. Edit the required fields, in our case Author and accepted Taxon.

Click Insert.
Note: New epithets and author’s names can only be added in blank fields, as existing ones cannot be overwritten. If you need to add a new epithet or author’s name, you can do it using any empty field of the infraspecific ranks.
Entering infraspecific taxa
Follow the previous steps and continue adding the relevant information in the suitable fields (Subspecies, Variety etc.).
Entering genera
Start by selecting Taxonomy in the main menu and then clicking new entry in the list Species form.

This opens a new edit Species form.

Make sure that the genus is not yet entered in the database, paying special attention to the existence of possible orthographic variants. Write the new genus (e. g. Razafimandimbisonia) in the Genus field and a drop-down list will display the genera already present in the database with their corresponding authors, families and identity numbers. Please note the possible existence of homonymous genera in the database. Always ay attention the author and family!
In our example Razafimandimbisonia is not yet entered in the database.

Open the edit Genera window by clicking Genus in the new edit Species window.

Start by entering Razafimandimbisonia in the Genus field (there is no drop-down list here), then the author in the Author field. Choose family using the Family field. Check always for the genus name in Index Nominum Genericorum ING. If the genus you want to enter is not there this should be noted in the Remarks field. Add a type species if known.
Click Insert when you are ready, making sure that everything is correct as the fields will no longer be editable after. The edit Genera window will close.

Now back in the edit Species form enter the author(s) in the Author field and choose genus in Rank. Then press the Insert button.

Entering hybrids
There are two possibilities for entering hybrids.
Entering hybrid formulas (e.g. Potamogeton berchtoldii x obtusifolius)
Open a new edit Species form, enter the genus name (for example Potamogeton) and choose Genus in the Rank field. Then choose x in the tax. Status field. Then click Insert. This makes the field tax. Status change into parents. By clicking on the parents button, you can enter the parental species. Save changes by clicking Insert when finished. The hybrid formula will appear on top line of the edit Species page, besides the taxonID and change the Rank field to species.

Hybrid formulas appear only as a genus name in the drop-down lists of the accepted Taxon or Basionym fields (each with its own ID number). To search for hybrid formulas go to the list Species form, input the relevant genus name and select x in Status.

Entering hybrid taxa
Enter the epithet in the corresponding rank (Species, Subspecies, Variety etc.) and proceed as explained above.
Typification
Information regarding types and typification should be entered in the database at two levels: Specimens and Taxonomy. In the edit Specimens form the T field allows you to choose the kind of type from a drop-down list (holo-, isolecto-, syn-, etc.). The field typified by should be filled in with the information available on the researcher who typified the voucher. Enter the researcher´s name, their herbarium or institutional acronym in brackets [e.g. (M) for Munich] and the date of the typification [e.g. S. Zarre (M) 1994].

Clicking on T opens the list Specimens Types window. Here, you should enter the names a given specimen is the type for. Click add new line to start inputting information and a second window edit Specimens Types will open. Enter the basionym in taxon (here only basionyms are correct), the kind of type in type, the reviser with institution acronym in typified by and date if available in date. Any further information can be added in annotations [e. g. information about lectotypification (please add the reference), divergent opinions about the typifications, etc.]. Click Insert to save and close the list Specimens Types window.

Note that a given specimen can be the type of more than one name, or that different revisers may hold conflicting or complementary opinions. In this case, use add new line to enter further typifications as explained before. If a certain species is type for a genus, you need to add this information to the type specimen.

Above the Genus field there is the type specimens button, which allows you to check the typification entries for the relevant taxon. This opens the list Specimens window, which displays the typified name (basionym) on the top with all the entered specimens listed under their accepted names. The specimens button takes you to the main list Specimens window where you will see all the specimens entered under the name, including those that are not types for that name. The number in brackets next to each button indicates the number of entries in each case.

Useful taxonomic and bibliographic links
Taxonomy
- APNI: The Australian Plant Name Index of Australian Plant Census (CHAH).
- Euro+Med: Taxonomic and floristic information from the Flora Europaea and Med-Checklist areas.
- ILDIS: The International Legume Database & Information Service.
- ING: The Index Nominum Genericorum, a compilation of generic names published for organisms.
- IPNI: The International Plant Names Index, a database of names and associated basic bibliographical details.
- The Plant List: Kew’s working list of all known vascular plants.
- TICA: The Global Compositae Checklist.
- TROPICOS: Missouri Botanical Garden’s database of nomenclature, bibliography and specimens.
- WCSP: The World Checklist of Selected Plant Families.
Literature online
- BHL: The Biodiversity Heritage Library.
- Biblioteca digital: The digital library of the Madrid Botanical Garden.
- GALLICA: The digital library of the Bibliothèque Nationale de France.
- Internet Archive: A non-profit organisation providing a vast permanant digital library.
- MDZ: The digital library of the Bavarian State Library.
Further useful links
- The Melbourne Code: The International Code of Nomenclature for algae, fungi, and plants.
Pedro's diagram (Google docs) type categories.
Karen´s diagram (Google docs)specimen typification.
Name categories diagram (Google docs) Name categories diagram.
Captures of name categories diagram (Google docs) Captures of name categories diagram.
Important modifications
Case 1
Dealing with a lectotypified taxon consisting of several syntypes which are recently linked to different accepted taxa, you may have problems to print labels for the syntypes. The accepted taxon on the printed labels will always be that of the lectotypified specimen independent of the syntypes.
In such a case you have to temporarily change the accepted taxon on the edit species page in accepted taxon to the name which you need to appear on the label. After saving your changes, you can print the labels.
Remember to change the accepted taxon back to that of the lectotypified syntype.
### mit Beispiel und vermutlich auch screenshots ######
Chorology
A click on the Chorology button opens a search form for chorological information of taxa.
Literature
The Literature form
Clicking on the Literature button opens a search window for literature references. As an example, open the record “Flora Orientalis” by Boissier. by typing „fl. orient“ in the field Periodical. You get a list of all the volumes under this title (in this case all the volumes are already entered into the database). There are seven volumes (1, 2, 3, 4(1), 4(2), 5(1), 5(2) and Supplement) published between 1867 and 1888, furthermore the volumes 1-5 were published by Boissier, the Supplement by Buser.

Click on the first volume to enter the record.

Fields of the literature data sheet
Going through the data fields from left to right, top to bottom:
| CITATION ID | Every literature record has its own ID number. |
| < > | The two arrows allow you to scroll through your search results. |
| DATE* | Date of publication. Written as: YYYY-MM-DD (or just YYYY-MM, YYYY). For references published over a period of time, the start and end date are entered in the 2 fields, respectively. |
| CATEGORIES* | Indication of the kind of literature (e.g. biography). Chosen from the drop-down menu. Most literature is listed as “floras, systematics” (in rare cases “biography”, “history”, “herbaria” etc. are used). |
| EDIT INDEX | List of newly described taxa. |
| CITED TAXA | List of mentioned taxa of special interest. |
| CITED PERSONS | List of mentioned persons of special interest. |
| LIST CONTAINER | Shows structure within complex literature (e.g. chapters). |
| EDIT CONTAINER | Enables to edit this structure. |
| URL | Link to publication online. Insert the web link or, if available, the DOI number (note 1). |
| TITLE* | Full title. This can be the title of a chapter, volume, monograph, etc. It is free text and ended with a full stop [.]. Do not abbreviate. |
| KEYWORDS | Describing the publication. |
| SUPTITLE | “super title” Cannot be inserted/edited any more; will be removed shortly. |
| ANNOTATION | Further annotations. Free text on anything to be noted. |
| AUTHOR{S}* | Chosen from the drop-down list. All (!) authors should be added in the order given in the literature itself or in a database. e.g. The “Flora of China”: each volume is edited by an editorial committee and composed of several chapters, written by different authors. Thus, the volumes themselves are inserted with the editors as AUTHORS, whereas the single chapters (genera or families) are entered as separate records with the respective authors. The chapter records can then be linked to the volume records by means of Edit Container. You can choose “unclear” if the authorship of the publication isn't evident or “Anonymous” if no name(s) are given. In the database, authors are given as: “Boissier, P. E.” for Pierre Edmond Boissier. If the forenames are unknown or unclear, only the name is listed. Names with “MC” or “Mac” are written as “McNeill, J.” Titles of nobility are inserted like “Wettstein, R. von”. Pay attention to the correct form of the double family name, e. g. “Fuente García, V. de la, Sánchez-Mata, D. & Moreno Saiz, J. C”. Multiple authors are combined with “&” and/or a comma i.e. “Schiffner, V. & Arnell, S. W.” or “Huter, R., Porta, P. & Rigo, G.” |
| EDITOR{S} | cannot be used any more, will be removed shortly. |
| PERIODICAL* | Periodical (note 4) or monograph (note 5) in standard abbreviation. Publications are chosen from the drop-down menu. They are listed in the database in standard abbreviation according to TL2,BPH or IPNI. Note that in this database the field PERIODICAL is used for both periodicals4 and monographs5 (special case: theses (note 6)) |
| UNNAMED (LEFT) | Volume, part etc. Volume number (in Arabic numerals or text i.e.“Supplement”). |
| UNNAMED (MIDDLE) | Subdivisions (also in Arabic numerals and/or text). |
| UNNAMED (RIGHT) | Pages, figures and tabulae. The range of pages. Essentially, the pages as noted in the book (in Arabic numerals). If the first page number(s) are not printed, but followed by printed numbers, this is indicated by [ ], i.e. [1]-278 or [1-3]-278 (with the first three pages unnumbered). If there is a preface with extra pagination, this is also indicated, i.e. “1-7, 1-278” or “i-vii, 1-278” (depending on whether these numbers are given in Arabic or Roman numerals.) In case the preface does not have any extra pagination or just a part of it, this is indicated by [ ], i.e. “[i-iii], 1-278” or [i-xv]-xxx, [1]-253. If there are several prefaces with extra pagination and extra symbols, this is also indicated (see the example below). Figures (note 2) and tabulae (note 3) are listed after the pagination with their abbreviations “fig.” and “tab.” (plural “figs.” & “tabs.”), separated by a comma. If the figures/tabulae are numbered this is indicated by “figs. 1-15”, otherwise the total number is indicated as “3 figs.”. Example: In more complicated cases, the complete pagination might look like this: “[i-iii], [i]-xxxiv, [1]-1017, 7 figs., tabs. 1-5” which means: (i) a first preface of unnumbered pages (ii) a second preface of numbered pages, with the first page unnumbered (iii) 7 figures without numbering (iv) 5 numerated tabulae. |
| PRINTER | Printer/publisher from the drop-down list, as indicated in the literature itself or in databases. |
| PRINTING LOC. | Printing locality. Free text, as given in the literature itself or in a database. |
| ADDITIONS | Further additions. |
| LISTING | Indicates whether the information has been checked on the basis of the original literature or is taken from other sources. Chosen from a drop-down list. Common options are: * CHECKED: the original literature has been seen. (NB: In this case the fields URL and/or SIGNATURE should be filled in as well) * DESIDERATUM: literature was inserted based on data from databases, but could not be checked. Desideratum indicates that this literature would be of interest and should be looked for. * OPEN: all the data inserted has been derived from databases or the herbarium specimen but the original publication could not be checked. * REPRINT: a reprint from the original literature was available and could be checked. This is additionally indicated in the reprint´s pagination or date which might differ from the original. |
| RECENT PUBLICATION | Tick box if applies. |
| SIGNATURE | Library reference number. |
| < LITERATURE | to return back to the search page |
| RELOAD | Makes saved changes in the form visible |
| RESET | Return to the original status of the record (only if the record has not been updated in the mean time). |
| EDIT | Make changes to an existing record. |
| INSERT | Insert a new record. |
| NEW© | Use an existing record as template for a new entry. |
| INSERT© | Make a new record based on the previous entry. |
| INSERT&NEW | Make a new record from a blank form. |
| LIBRARY | Information about availability of the reference in libraries, pdf collection, internet sources. |
* fields with an asterisk are mandatory
Working in the DB
Searching
Some recommendations to optimize searches:
A general search query using only the field Periodical for the name of an important journal will yield dozens of entries, making it necessary to refine the search terms.
In the case of monographs with a single or few volumes it is specific enough to search for the name in Periodical (note that in this database the field Periodical is used for both periodicals and monographs.).
PERIODICAL:
Following the example “Flora orientalis” by Boissier. First start with a general request.
Type in “flora orientalis” in Periodical. No results are shown because in the field Periodical you can only search for the standard abbreviations (see also: Sources of information).
The standard abbreviation for the “Flora orientalis” by Boissier is “Fl. orient.”, so type this in Periodical and you will get all volumes listed. It is sufficient to type in “fl. or” or “orien”. You do not need to type the entire title (but do not forget the full stops and spaces within).
TITLE:
Here, you cannot search using standard abbreviations, only the original wording of the title. It is also possible to search using fragments of the title, like “flora or” or “orien” to get a result.
AUTHOR:
Generally you only search using the surname. It is not necessary to write the whole name. Note that the author may change during the publication period or among volumes. In the example of Flora orientalis searching for “Boissier” will only display volumes 1-5, because the Supplementum was written by Buser.
If you search for “Boissier” without any other search terms (Year, Periodical etc.) you will get dozens of entries. Refine the search query by filling in a combination of different fields.
VOLUME:
This is useful for refining a general search query in a Periodical with many databased volumes.
Please Note: In contrast to the other fields it is not possible to search for pieces of the volume number. If you search for “1”, you only get volume 1. If you use the wildcard-character ”%” i.e. you search for “1%”, you get volumes like 1, 17, 113 and also 113a.
YEAR:
To search for the publication date. If you search for a date in the format YYYY-MM-DD, which is entered just with the publication year, you will obtain no results. It is also possible to leave last digits out. If you know the decade of publication, but not the exact year i.e. for literature from the 1880s search for “188”.
TROUBLESHOOTING
Some reasons why you may not find the literature you are looking for, even though it is in the database:
| “typification” | Some citations are inserted as rudimentary records because the original literature was not available. For example only the Periodical, Author and the Year were inserted, whereas the title was unclear. Instead these fragments are therefore entitled “typification”. In most cases, the pagination of these entries is reduced to a single page. If you have the original literature, check whether this page lies within the range of pages. In most cases, these typification entries were created because a taxon was originally described there. In most cases you will find a taxon entry with a given page if you click Edit Index. If this description is part of your publication you can be certain that you are in the right record.) In some cases the author(s) of the newly described taxon entered in the field Author is not the same as the one who actually published the paper. “typification” entries are provisional! If you have the original literature, edit the record and fill in all the missing data. |
| looking for the wrong year | Often later volumes of a given year were published the following year. This leads to situations like a publication date of 1859 for an August volume of 1858. Publications spanning over long time periods can be also problematic. In the field Year you can only search for the beginning of this period (i.e. if the publication date for you reference is 1850-1851; searching for 1851 will not bring up the record) In both cases it might help to leave out the last digit and broaden the search. |
| looking for the wrong “periodical” title | Some periodicals may change their titles over time, for example: 1895-1915: Notizblatt des Königlichen Botanischen Gartens und Museums zu Berlin (-Dahlem). Vols. 1-6 1916-55: Notizblatt des Botanischen Gartens und Museums zu Berlin-Dahlem. Berlin-Dahlem. Vols. 7-15 1953: Mitteilungen aus dem Botanischen Garten und Museum Berlin-Dahlem. Berlin-Dahlem. Vol. 1(1) 1953+: Willdenowia; Mitteilungen aus dem Botanischen Garten und Museum Berlin-Dahlem. Berlin-Dahlem. Vol. 1(2) or Feddes Repert. Spec. Nov. Regni Veg. (Vols. 52-69, 1943-1964) with its successor Feddes Repert. (Vols. 70+, 1965+) and its Predecessor(s) Repert. Spec. Nov. Regni Veg. (Vols. 1-51, 1905-1942) |
| Incorrect spelling | In rare cases authors or standard abbreviations of literature may have been entered incorrectly in the database. In other cases alternative spellings have been used, e.g. Boris Stefanov instead of the standardized spelling Boris Stefanoff linked to IPNI. Some journals have two names in different languages. For most of them, there is one standard abbreviation listed in BPH. Sometimes an abbreviation of the name in a second language also exists. Check for alternative names in BPH. Make sure that the fields LISTING and CATEGORIES are set on “everything“ for a general search. |
Entering new data
After being sure that the literature is not already databased (including an incomplete version as “typification”), there are two principal ways to create new entries:
- start with a blank form or
- use a similar, existing entry as a template
NEW ENTRY
By clicking on this field on the search page, a blank sheet (without ID) opens. You can now fill in the data according to the aforementioned formats. Fields that are highlighted against a blue background are obligatory. When finished, press Insert to save the record. As a result, a new ID appears in top left corner.
NEW & COPY
In many cases it is useful to take a similar existing entry as a template for a new entry, i.e. when several volumes of a series have been published.
Open it and click New & Copy. This will open a new form, with all the data of the original entry. Change the relevant fields (like the title, author, publication date etc.) according to your needs, then click Insert.
This will generate a new record (with a new ID), while the original remains unchanged.
INSERT & COPY
By clicking this button, the current record is inserted into the database and a new record is opened, with the fields filled as in the one you just saved. You can now make the relevant changes and insert it as a new entry.
INSERT & NEW
By clicking this field the record is inserted and a blank sheet opens.
Editing data
This option is used to amend existing entries. By clicking Edit the edit mode opens. Now work on the form and click Update to save your changes. Please Note: By clicking Literature you can leave your form without saving your changes or inserting new records. Your changes are only saved after clicking Insert or Update. Just pressing Edit does not save anything! After editing a record check again the changes you made in it. It is also advisable to look again for it from the list Literature window.
Entering new data in the drop down fields
Drop-down lists are found in the fields Categories, Authors, Periodical, Printer and Listing. It may occur that you do not find the entries you need in the list. Searching in the drop-down list is different from the literature search page. Note that it is not enough to type in a single letter in the drop-down menu. You need at least two letters or one letter and the wildcard %. Furthermore, it is only possible to search starting with the beginning of the words.
Example:
The “Österreichische Botanische Zeitschrift” is recorded as “Österr. Bot. Z.”, which is the standard abbreviation. As the database also contains the complete title, searching for “österreichische” or “botan” will also lead you to the relevant entry.
Always check thoroughly whether a record really exists before creating a new one. Avoid double entries!
By clicking the Authors, Periodical or Printer buttons, a small window opens. If necessary you might add details or make changes to an existing record. After editing click Update.
If you want to insert a new record in one of these fields, click on the field button you need and use the button New to open an empty data entry sheet.
AUTHORS:
Type the standardized name in Author. Referring to IPNI - AUTHORS. Fill in the full name, the date of birth and death (and if necessary other data) in Autorsystbot. This only applies for single authors, not for author combinations (Autorsystbot is left empty in the latter case). For information on authors see sources of information.

PERIODICAL:
Fill in the standard abbreviation of the publiction here.
In Full Name add the full title, but also dates of publication, data on volumes, printing locality etc.
In TL2, BPH & IPNI fill in the relevant catalogue numbers (see sources of information).
Successor: publication titles may change over time. Choose the new publication name in the drop-down list (listed by standard abbreviation).
Predecessor(s): is generated automatically, if the previous “periodical” is linked with the successor.

LIBRARIES:
Found in the top right corner, to record where to find a given reference, i.e. in a library or from an internet source.
Clicking on this field will open a list, which might already contain some entries.
Clicking Add New Line opens a blank sheet, where you can choose a library (or internet source) from the drop-down menu; fill in the signature (library reference number); add a URL; add Stock (volumes available).
By clicking Insert the data is saved, using Cancel you leave the page without saving any changes.
To change existing entries click Edit and save the changes by clicking Update. Click Reload to make the changes visible on the Edit Literature page.
Structure of literature
In the simplest case, a work is written by a single author and published as a stand-alone publication. More often, there may be different chapters (e.g. family treatments) or parts published by different authors or at different dates, which makes a separation necessary. The same is to be done with works published in several volumes.
Be aware that small chapters within larger publications are sometimes written by different authors and should be treated as separate entities.
In the past, many books were published in sections and sent in unbound versions to recipients by the printing companies. As soon as a volume or a part of it was complete, it was brought to a local bookbinder. They had, in certain respects, different possibilities to arrange the pages. Sometimes illustrations were placed at the end of the book or within the text; the title pages were sometimes completely removed and discarded. Different books might therefore have a different sequence and your book may be different from descriptions in literature databases.
In case of removed title pages, you have to try to seek this information from other sources (e.g. TL2). There can be inconspicuous indications on the publication dates of the different parts. Knowing that title pages were often discarded, the publishers in many cases wrote extra notes at the bottom or the top of the text pages regarding the publication dates. As an alternative, you might find the publication dates of the different parts listed at the beginning or the end of a book.
Note that one work can be split abruptly into two or more continued fractions linked to different publication dates, and as a result, even one newly described taxon in this work might be linked to two different dates.
Complex literature is organized in several levels of hierarchy, like the “Flora Iranica”, which comprises several volumes which are furthermore divided into different taxonomic treatments, often containing chapters by different authors.
How to document this structure
Before you start, always make sure that you really understand the whole structure of your reference. The smallest entities are mainly chapters or even parts of them by a given author. If these are split over different publication dates you have to insert them separately. These entities are the most important ones, as all the taxa descriptions are linked to them. To display them within the context of the whole publication, you also have to add the higher hierarchy levels to the database.
For example:
“Botanische Reisen in den Hochgebirgen Chinas und Ost-Tibets.” by W. Limpricht is a report on an excursion by Limpricht, published in the 12th volume of the Repert. Spec. Nov. Regni Veg. Beih. in 1922.
This report is divided into two main parts:
“I. Botanische Reisen in den Hochgebirgen Chinas und Ost-Tibets.” by Limpricht.
“II. Aufzählung der von Dr. Limpricht in Ostasien gesammelten Pflanzen” by Pax.
The second part itself is composed of family treatments by different authors, i.e. “Asclepidiaceae” by Schlechter or “Symplocaceae” by Lingelsheim & Winkler. These family treatments are the above mentioned smallest entities, which contain descriptions of new species.
This should look like the following:
- Botanische Reisen in den Hochgebirgen Chinas und Ost-Tibets - Limpricht
- I. Botanische Reisen in den Hochgebirgen Chinas und Ost-Tibets - Limpricht
- II. Aufzählung der von Dr. Limpricht in Ostasien gesammelten Pflanzen – Pax
- Asclepidiace – Schlechter
- Symplocaceae - Lingelsheim & Winkler
All these different hierarchical levels have to be documented and then linked. In our database these hierarchical levels are called containers, as they can contain other pieces of literature.
Linking is done by using the option Edit Container. This opens a form in which you can insert the next higher container (=next higher hierarchical level).
At the top of the window you see the literature you are working on; below there is a blank line (if it is still unlinked!).
Set a check mark in the small field on the left and then search for the next higher container in the blank field. In most cases it is sufficient to type in one of the authors and the year of publication. You then get one or several results in the drop-down menu. Choose the right one (according to title, pagination etc.) by clicking on it. Then confirm with Update.

The Edit Container option can also be used to delete erroneous entries by clicking on the white cross in a red circle (“delete entry”).
To view the complete structure of a reference, click List Container. You will get a tree, showing all the linked (!) entries at different hierarchical orders. By directing the curser arrow to an entry an extra box with all the full reference pops up, which will take you to the corresponding record if you click it.

"typification"-entries
They are set up for literature that is not available, e.g. if you know that Wood published Didiplis diandra on page 124 of “Amer. Bot. Fl.” but you cannot check the title and the range of pages; you still need to insert the citation in order to print a label.
Therefore, you fill in as much as you know. This will probably include the publication year, authorship, periodical and the page where the taxon is described.
As Title you enter “typification.” and set the Listing to “open”. After inserting the record you can link the taxon via Edit Index.
If you subsequently find additional information concerning “typification” entries in the database, please complete the entry.
schedae-publications
Up until January 1st, 1953, schedae [scheda, also scida (pl. schedae), latin for “papyrus strip”, “tag” or “sheet”] were a valid form of publication. They were validly published as long as they contained a diagnosis or description, were reproduced mechanically or graphically and were distributed according to the ICN. After this date, they were only validly published if also distributed independently of the exsiccatae (e.g. as a paper in a journal or a fascicle).
Schedae publications once were common, especially in the form of series. These were distributed with labels for all the specimens and new taxa were described directly on them (e.g. the series “Flora exsiccata Austro-Hungarica” by Kerner, which contains many descriptions in schedae).
There are many different forms of publications in schedae. The simplest case is a collection of a single taxon with reproduced labels including a description. They can also be part of an often numbered series. Sometimes, labels were also published as a separate booklet (with pagination). The way to treat these in the database differs from case to case, so always check TL2 for further information.

How to enter a schedae-publication
For a single taxon, the fields are filled in as follows:
Date: as indicated on the label
Categories: floras, systematics
Title: taxon name
Author(s): as indicated on the label
Periodical: “in schedis lithogr.”
Unnamed Fields: in case, there is a number given, enter it in the third field
Listing: “checked”
Then go to Edit Index and link the entry to the corresponding taxon.
In the case of serials, they mainly have a title such as “Schedae ad floram exsiccatam austro-hungaricam” or “Schedae ad Floram Italicam Exsiccatam”. The full title should be entered in the field Title; in Periodical the abbreviated title should be entered (e.g.” Sched. fl. exs. austro-hung.”). For abbreviations check our database IPNI or TL2.
In most cases the editor is given as AUTHOR, but taxa within the series can be described by other people. Series are generally numbered, so indicate this as well. Some serials are organized and distributed in centuriae or other divisions, e.g. the “Herb. Norm. Sched.”. This structure is also documented in the database.
The centuria (latin for a division of a hundred) number is given on the left of the unnamed fields. In principle, this field is restricted to numerals. Hence, “Cent.” is suffixed after the series abbreviation, in this case “Herb. Norm. Sched. Cent.”, the number of the centuria is entered in the left and the range of numbers in the right field.

Depending on the information available, document the schedae-number and/or the page number(s) of the bound version of the schedae in the Edit Index sheet.

Miscellaneous sections in publications
In some cases species are published in a section of a publication that groups together miscellaneous information (i.e. a list of events during the year including new species found, conference summaries, new books published etc.). These can be grouped in a notes, news or miscellaneous section of the journal. In the database, the section is treated as a whole and entered under the name of the section with authors as “Varii”. You then enter a new entry with the author of the section where the species is published and fill in the rest of the data entry sheet as usual. You then must click Edit Container, select the section where this comes from in the drop down menu and tick the box; to show that your entry is part of the wider section under “Varii” as author.
Example:
“Smärre notiser. Lärda sällskaps sammanträden.” in Bot. Not. 1883: 62-79. (A list of notes concerning different botanists and events for the year 1883.)
Within these notes there is a list of mosses published by S. O. Lindberg which was relevant to the specimen being entered. Therefore, one entry was made that encompasses “Smärre notiser. Lärda sällskaps sammanträden.” Bot. Not. 1883: 62-79 under Author: “Varii”. A second was made for S. O. Lindberg´s section Bot. Not. 1883: 63-63 and this entry was linked to the “Varii” entry. The specimen can therefore be entered using S. O. Lindberg´s citation in the journal.
How to link taxon names with the relevant literature
Literature records can be linked with taxa, using Edit Index or Cited Taxa. By clicking on these fields a new window with a table opens in which taxa can be added (Add New Line), with the relevant pages and figures/tabulae.
Existing entries can be edited via Edit.
For further information see this chapter in the Taxonomy manual.
Sources of Information
Extra information can be found within the publication itself. On the first and last pages there are often indications as to whether a book was published in parts or not with the respective dates and other valuable hints. In journals, where several issues are often bound together, go to the first pages of an issue to find more detailed information on publication dates or issue numbers.
Additionally there are several databases which should always be consulted. There, you can find information on standard abbreviations, publication dates, publication history, changing editors, inner structure etc.
The most relevant databases are:
The Botanico-Periodicum-Huntianum
Link: BPH
This internet database is based on the printed volumes of the Botanico-Periodicum-Huntianum. BPH is the standard reference for abbreviations of journals and periodicals. It contains records on journals and periodicals, comprising their full titles, standard abbreviations, periods of publication, chronology, volumes, etc. This data should be noted in the Edit Periodical form.
Basically the BPH entry is copied and pasted in this field, but:
* the abbreviation is recorded only in the first line (Periodical)
* successors and predecessors are only noted in the respective field below
* and the last two numbers are deleted.
Example: Österreichische Botanische Zeitschrift
BPH entry:
Oesterreichische botanische Zeitschrift; gemeinütziges Organ für Botanik. Vienna. Vols. 8–91, 1858–1942; vols. 94–122, 1947–73. Oesterr. Bot. Z. Preceded by: Oesterreichisches Botanisches Wochenblatt. Vienna. For vols. 92–93, 1943–44, see: Wiener botanische Zeitschrift. Vienna. Superseded by: Plant systematics and evolution. Vienna, New York, NY. ULS 4-3140-2. HI 69249
Database entry:

Taxonomic Literature-2
Link: TL-2
An online, freely accessibe database based on the 13 printed volumes of “Taxonomic Literature” by Stafleu & Cowan.
It is searchable by author, title, TL2 number (always type numbers always without fullstops) and publication year. Results contain information on author names, biographical data, references and independent publications (publications in journals are not normally listed!). Information on the publications is very detailed in most cases, including TL2 number at the beginning of each entry, full name, standard abbreviation, precise publication dates, structure, authors, page range and format. It is also the standard reference for the abbreviations of monographs.
As in entries for journals, the relevant data is filled in the Edit Periodical window.
Example:
2649. Monograph of the genus Digitaria. Leiden (Universitaire Pers) 1950. Oct. (Monogr. Digitaria). Publ.: 15 Jan 1950 (p. 999: “edited [= published] 15 January 1950”), frontisp., p. [i]-xxi, [1]-999. Copy: U.
The information from the TL2 entries is entered in the literature data sheet itself. Additionally the extra information is recorded in the Edit Periodical window, comprising:
* Periodical: TL2 abbreviation (given in italics in brackets at the end of every TL2 entry)
* Full Name: full name, publication locality, publisher, structure and publication dates
* TL2: TL 2 number, given at the beginning of every entry
* Data given after “Copy:”, indicating from where copies of the respective literature were known to the authors are not recorded.
Note “Oct.”, given after the publication date and before the standard abbreviation, refers to the original format of the book (= octavo, each sheet was folded and cut in eight pages) - don't enter it as the publication month October!
The Harvard University Herbaria
Link: HUH
Usually consulted as a database for botanists and collectors. It can be used in addition to TL2 and IPNI, for data like the full name of an author, or the topics and regions an author worked on etc. In contrast to IPNI and TL2, collectors and botanists who did not describe any new species are also listed.
The International Plant Name Index
Link: IPNI
A general database of plant species names and their original publications. IPNI is the standard reference for the standard abbreviations of authors (see taxonomy manual).
It is also the source for the IPNI- and the BPH-number, which should be recorded in the Edit Periodical form. See screenshot above.
TROPICOS
Link: tropicos
Another general database on nomenclature and bibliography (in many cases with direct links to BHL).
The International Code of Nomenclature
Link: ICN
The first Code was published in 1905 after the first International Botanical Congress. Ever since, the Code is updated every five years (after each International Botanical Congress). Each new version replaces the previous one, the current one is the “Melbourne Code” from 2012 (named after the location of the last Congress).
There is a very useful “Search” - option at the start page.
Other Sources
Besides these databases, there are several internet sites providing literature online. The most important ones are:
BHL (Biodiversity Heritage Library), searchable for periodicals, titles, authors and cited taxa.
Archive, searchable for periodicals, titles and authors.
Biblioteca Digital del Real Jardín Botánico CSIC, searchable for periodicals, titles and authors.
In case you are looking for a particular reference always check in our database whether there are any entries regarding signatures in libraries or direct links to internet sources.
Notes
(1) DOI (Digital Object Identifier): unique, persistent link for the given reference. It is not the URL, but is assigned additionally. It is a character string used to uniquely identify an electronic document or other object. See Wikipedia for further details.
(2) Figure: illustration, which might be a picture, photograph, drawing, map or a diagram.
(3) Tabula: a set of different figures arranged on an extra page. These categories are used inconsistently by different people, so just follow the indications of your reference.
(4) Periodical: journals which are published more or less periodically in volumes.Titles sometimes change or ceased, but technically on-going. Comprised of articles by different authors.
(5) Monograph: planned to be completed. From single books to works with some to many volumes. By single to many authors. Publication of volumes is not necessarily regular.
(6) Theses are entered as “Ph.D. Thesis, Univ. Leiden, The Netherlands”, “Ph.D. Thesis, Porto Alegre, Universidade Federal do Rio Grande do Sul” [kind of thesis, locality, country]. If necessary, diploma theses also can be entered like “Diploma Thesis, […], […]” but note that diploma theses are no official publications in contrast to Ph.D. theses.
Specimens
The "Edit Specimen" form
ln the following, the “edit Specimens” window (the data entry sheet for the specimens) will be explained in detail from the left to right, top to bottom. Fields highlighted in blue, have to be filled in in order to save the entry; fill in the other fields depending on the information provided on the specimen.

Your herbarium might have special rules regarding the databasing; please refer to the Herbarium specific information for more details!
*
Clicking on * opens a list showing which users have edited the specimen, and when changes were made.
SPECIMEN_ID
A new specimen entry is indicated by New. A specimen_ID is generated once Insert is clicked (bottom line). This creates a new data record; New will change to 123456, and editing will no longer be possible; click Edit to start editing again. The specimen ID will change from yellow numbers to black numbers highlighted in green, indicating the input mode. Changes are saved by clicking on Update (bottom line).
Clicking on the yellow specimen ID opens a form for printing labels which is also possible from the main menu and from the list Specimens form.
< >
Allows you to scroll through the specimen entries generated by a search query on the list Specimens window; only visible when opening existing specimen entries (these arrows will not show up directly after clicking Insert or Update).
API
This may or may not be present in your database version. Tick this box if the specimen is relevant to the “African plants initiative”.
DIG.IMAGE
(= Digital image/photo of the specimen) Ticked only if the specimens are scanned (type specimens or material on loan). Clicking on Dig.Image will open the image in a new browser window.
DIG.IM.OBS.
(= Digital image observation) Selected if an entry is based on a field observation with a picture only; Taxon, Locality etc. are filled in as would be a herbarium specimen.
CHECKED
Should only be ticked after the final check of both the specimen's data entry and scan.
ACCESSIBLE
Selected for the entry to be available on the public web interface: The Virtual herbarium
INSTITUTION
Select the institution the specimen belongs to (e.g. “W” for “Naturhistorisches Museum Wien”) from the drop-down list.
HERBAR NR.
The stamped, continuous, unambiguous number of the specimen (usually found near the upper top corner of the specimen).
Note: This number HAS TO BE ON THE SPECIMEN before scanning, if missing it has to be stamped beforehand. The herbarium number is very important to be able to connect the scans that will be taken with the correct specimen entries! Double check it! Anything Other than arabic numerals has to be written in Annotations.
COLLECTION
Select the collection to which the specimen belongs to. If several collections are indicated, take the oldest one and write the others in the Annotations field.
NR.
Used for the old herbarium numbers of special collections that were previously on the specimen, before the current herbarium stamp was added; e.g. in W, the orchid collection of Reichenbach (Collection: W-Rchb.Orch.) – type only arabic numerals into this field, type letters into the Annotation field).
LINKS
A new input window will open in which you can link (two or more) specimens that belong together. Linking is required if…
- specimens have been separated to two or more new specimens
- several sheets belonging together are present (sheet 1/ 3, 2/ 3 and 3/ 3)
- there are drawings (=delineatio typi) belonging to the specimen
T TYPE
Only relevant for type specimens – left empty for all other specimens; select from the drop-down list. The status has to be the same as on the herbarium specimen (choose the most recent typification).
The T can be clicked on, which will open a new window. See chapter "Typification" in the taxonomy manual.
STATUS
Notes of aff. (affinis=close to), agg. (aggregate=complex), cf. (confer=it probably is), s. str. (sensu stricto= in a narrow sense) or s. l. (sensu lato=in a broad sense) after the taxon name on the label; do not enter nov. spec. or x (for hybrid), they will only be used in special cases.
GARDEN
Originally cultivated material from a garden, e.g. “HBV”
VOUCHER
Information on voucher status (caryological investigations etc.); choose from the drop-down list; new voucher types may be entered when clicking on Voucher.
TAXON
The current name for the plant (including the author), after typing in at least the first few letters of a taxon [it is best to use the genus and the species, e.g.: “car hir”] choose from the drop-down list.
Taxa that are shown against a red background are non-accepted taxa and may only be chosen if the herbarium institution chooses to file specimens under the basionyme (e.g. in WU and W Krypto), but never if the current name should be entered (e.g. in W).
Special case: Hybrids
Genus or species hybrids are recognized by the multiplication sign X. See the Taxonomy Manual for further information!
DET / REV / CONF
Det(erminavit): the person who determined the plant; rev(isio): a new or re-determination; conf(irmavit): the person who confirmed the determination, i.e., agreeing with the previous determination. Always enter the name of the most recent det., rev. or conf. as exactly as possible, e.g.: A. B. Surname (XX) YYYY-MM-DD with (XX) being the standard acronym for the herbarium where the person was active, e.g. WU; see “Index Herbariorum”.
Example: H. Rainer (W) 2013-03-12
If the last note of a person is not a determination, but an annotation, this person should be entered instead of the last “true” determiner; if the person is unknown enter “Anon.”. If the name is illegible, enter “Unclear”.
Special case - Type material: If the original name including the author is given, and there is no explicit determiner for this name, you can assume that the author of the name is also the determiner.
IDENT.HISTORY
Enter the determinations chronologically, starting with the oldest (original), according to determination labels on the sheet. Do not enter the author names of taxa! Ignore labels without new determinations (i.e. typification labels).
The last determiner entered in the identification history, should be the same as the one entered in Det/Rev/Conf., followed by the same name as in the Taxon field. [The only exceptions are type specimens in herbarium institutions where the basionym is entered in the field Taxon, e.g. WU or W-Krypt.] Do not use any punctuation at the very end of the entry in Ident.History.
| ; | separates determinations of different persons |
| ! | confirmation of previous determination |
| Anonymus | determiner unknown |
| next | determination of the same determiner as before, but no date is given; if a date is given, write “next YYYY-MM-DD:”. |
| orig. | first determination, if done by the collector. If not, use the first determiner's name instead of “orig.”. |
| Unclear | name is not readable or unclear |
| := | name assignments or classifications without a “true” determination, based on synonymy lists |
TYPIFIED BY
Only relevant for type specimens – left empty for all other specimens.
The typifier is the person that typified the specimen first with the most accurate status (labels which only confirm an earlier label are not taken into account); if only the taxon name and spec. nov. is given, enter the author of the name as the typifier; e.g.: A. Surname (XX) YYYY-MM-DD. If the typifier is unknown enter “Anonymus”.
SERIES
Only relevant for Exsiccata series – choose from the drop-down list. True Exsiccata series are often widely distributed collections of specimens, often with printed labels (some old printed labels can look as if they were hand written), typically with a serial number, often “Flora exsiccate” or similar as a title.
Do not enter new series!
SER.NR
The serial number of the Exsiccata series. Enter only Arabic numerals; sometimes a collector's number is given as well (see below).
FIRST COLLECTOR
If there is more than one collector on the label, only enter the first; enter the family name (or parts of it), and choose the correct collector from the drop-down list.
| “Anonymous collector” | collector unknown |
| “unclear” | name is illegible (write readable parts into Annotations). |
Adding new names as first collector: Only when you are completely sure that the collector does not exist in the list! Click on First Collector, the edit Collector window opens:

Enter the name of the collector (Family name, comma, Initial(s) with dot(s) – without spaces!); if the first name is unknown, only enter the surname. In the other field enter the record number of HUH: The Harvard University Herbaria. Click on Insert to save the collector. You can now choose it from the drop-down list).
Note: Please be CAREFUL when you enter a new name as it cannot be corrected!
NUMBER
The collector's own collecting number (enter only Arabic numerals, for anything else: see Alt.Nr.); if absent, enter “s.n.” (sine numero) in the field Alt.Nr.
ALT.NR .
(= alternative Number) Enter the collector's number including punctuation (full stop, colon, dash etc.); or those parts of the collector's numbers that are not Arabic numerals; e.g.: 3857a: 3857→NUMBER, a→ALT.NR.; in case of more than one number, enter the second here; otherwise leave empty. Enter “s.n.” (sine numero) if no collector's number is given.
DATE
The collection date. Format: YYYY-MM-DD or YYYY-MM or YYYY; missing years or illegiable dates can be replaced with “#”, e.g. 18##-06-06 or 18## or 189#. Enter “s.d.” (sine dato) if no date is given.
ADD. COLLECTOR(S)
Additional collectors to the first collector; enter in the same order as on the label, choose from the drop-down list.
Only when you are completely sure that the collector does not exist in the list! Click on Add.Collector(s), the edit Collector 2 window opens:

Enter the name of the collector(s) (Family name, Initial(s) separated by dot(s), no spaces in the name!), they are linked with “,” and “&”, for example: Müller,K.H., Meier,S.H. & Kugler,K.L. Click at Insert to save the entered name (and insert it to the database).
Note: Please be CAREFUL when you enter a new name as it cannot be corrected!
COUNTRY & PROVINCE
Enter the country only when known with certainty; choose from the drop-down list. For old specimens: enter the current political territory; check the historical geographical situation compared with the present: see Geonames
In the Province field you can choose from a drop-down list (only possible after entering the Country). Please enter the province only when known with certainty.
GEONAMES
Enter the name of the locality as exact as possible. When clicking on geonames a new window opens which allows to find and choose the correct locality. Selecting one by clicking use this will automatically enter the coordinates of the chosen locality into the Lat and Lon fields.
If you use the geonames service please always check the coordinates via Google Maps or a comparable service and enter the appropriate deviation into the exactn.(m) field.
If you do not find the desired location in the drop down menu, exit the geonames service and delete your entry in the geonames field.
ALTITUDE
Height above sea level (elevation) in meters (only digits, no full stops, commas, letters etc.); if the altitude is given as an interval, use both fields. If the original altitude is given in feet (', Fuß, ped), convert it to meters (1m = 3.28')
QUADRANT
The quadrant number, used e.g. in floristic inventories, consists of a four- digit number (the grid number), followed by a single-digit (the quadrant number, which divides each grid cell into four fields). After entering both numbers you can click on °→ and the coordinates for the quadrant will automatically be entered in the fields Lat./Lon; use this only when more precise coordinates are not available.
LAT./LON. & EXACTN.(M)
Latitude and longitude (GPS-data), entered as degrees (°), minutes ('), seconds (''); only seconds may be rounded; convert decimal fractions if needed. For more information on this please refer to this page
In the Exactn.(M) field you can specify exactness of measurement of latitude and longitude, if given, e.g. “500m”.
LOCALITY
The collecting locality as written on the collector's original label, including country, province, altitude etc. (if given). The locality should be written as on the label, including with old spelling and special characters, e.g., ä, ö, é. If needed, add current names/spellings within square brackets [ ]. If parts of the text are illegible, indicate these passages with […]; for unclear transcriptions [?], e.g., Fluss[…]e or Flufgufer [?]; Comments are entered in square brackets [ ].
Enter “sine loco” if no locality is given.
Special case - Type material: May be complemented by using literature; enter “[protologue]” or reference (abbreviated), including year and page(s), e.g.: “Drège (1843) - Flora 26: 149”. You may also use information from other specimens with exactly the same collection number and more exact information on the original label. In this case leave a note in the annotations.
HABITAT PHOROPHYTE
= biotope, “ecology”, substrate, surrounding vegetation; for epiphytes (plants growing on other plants, e.g. lichens) the phorophyte (the plant it is growing on) is given. E.g., riparian forest, Quercus-Caprinus-forest, dry slopes, swampy meadows, limestone, clay marl, collected together with XY, etc. If part of locality (if it is not possible to separate habitat information from the locality information) copy the habitat information.
HABITUS
The appearance of the plant, the growth form, shape/color of flowers etc.; e.g. long awns, runners, flowers yellow. It is not necessary to enter extensive (and often hand written) descriptions of the plants; just add a note in the Annotations field like: ”[decription on label].
ANNOTATIONS
Written in chronological order, consisting of separate notes or different labels in an extra paragraph, additional information on the collector and other notes on the specimen from the label(s), which cannot be entered in other fields (if possible indicate date and person); your own annotations [in square brackets]; complementary information on e.g., illegible collector names (additional information, if “unclear” was entered in First Collector, you may use “#”, but never “?”, as it cannot be searched for); transfers and acquisitions from other herbaria/ collections; specimen stamps or labels that cannot be chosen from the drop-down list at Collection; locality of duplicates at other herbaria (use the standard herbarium acronyms found at Index Herbariorum: e.g. “ex E”.
< SPECIMENS
Go back to main menu for specimen search, deletes entries if not saved.
RESET
Reset will go back to the original state of the entry, and new entries you have just entered will not be saved.
INSERT
Insert and save the newly created specimen entry; New will change to a new specimen_ID; Insert and Insert&New will disappear, Edit and New&Copy will appear.
INSERT© / INSERT&NEW
Insert&Copy will insert the newly created specimen entry into the database and additionally copy this entry to use it as a new specimen entry. Insert&New will insert the entry and open an empty data entry sheet.
EDIT / UPDATE
Start editing again, the input mode is indicated by 123456, changes will be saved by clicking on Update.
NEW & COPY
Create a copy of this entry to use it as a new specimen entry.
Workflow
If you want to enter a new specimen you have two possibilities:
- open an empty entry form by clicking on New Entry.
- search for a specimen that is already entered in the database which is similar to the one you want to enter, copy and modify this specimen.
When searching for a specimen you can either choose an entry from the drop-down lists in Institution, Continent or Region, or search for e.g. Taxon or Collector whilst entering your search criteria; just sections of the word may be typed in and no % or * is required as a place holder.
Note: By clicking on the yellow field Institution you can switch to Collection, allowing you to search only for specimens in a certain collection of an institution.
Note: before you enter a new specimen into the database make sure that it is not already entered (search for the taxon [also only for the first few letters as it may have been mistyped]), herbarium number, collector etc.).
Entering a new specimen from scratch
lf you decide to open an empty entry form, click on New Entry in the “list Specimens” form. This window opens:

As an example we use this specimen:

The information on the label is filled into the form as follows…

…which results in:

For a detailed explanation on the individual fields please refer to the edit specimen form.
For a comparison of herbarium sheet images and filled-in data entry sheets please see the examples.
Creating a new database entry by copying and modifying an existing specimen
Again, this specimen is used as an example to illustrate the workflow:

As it is often easier to copy and modify an existing specimen, than entering it from scratch, we search the database for similar specimens that are already registered [start with only one or two search criteria]. Typing in “schneeweiss” into the field Collector, “carex” into Taxon, “georgia” into Country and pressing Search, results in:

As the second entry (Carex rupestris collected by Schneeweiss et al. 2002 in Georgia) looks most similar to our specimen, we click on it in the “Taxon” column and the specimen data sheet for this entry will open.

To copy and modify the entries of this specimen click on New&Copy in the lower right corner. The Specimen_ID [in the upper left corner] will now change from 33226 to New, indicating that a new specimen entry is being created and that it is now possible to modify it without changing the old one.
The information on the herbarium sheet should be entered as follows:
After clicking Insert [on the bottom line] a new specimen entry will be created:
Herbarium specific Information
Herbarium W
This is work in progress…
- W: Herbarium number
= acquisition number (the number given to the specimens when it came to the herbarium). At W there are two possibilities:
11-digit number: e.g. Acqu 1960 Nr 1234 [=1234 specimen from the year 1960] should be written as 1960-0001234 [4 digits + 7 digits]
7-digit number: especially on recently stamped specimens. e.g. 0001234
In W the Herbarium number has to be present on the sheet before entering the specimen into the database.
- W: Collections
W is the universal code for the collection of the museum. Other collections will be indicated by a stamp or handwriting. If several collections are indicated, take the oldest one and write the others in the annotation field.
- W: Links
In some cases several collections are mounted on the same sheet. If those belong to seperate taxa, the collections are separated and mounted on separate sheets. If the collections belong to the same taxon, they remain on the same sheet, but create two entries into the database. Those entries are named 1234567A and 1234567B, respectively, and linked to one another.
- W: Taxon
Always enter the current name of the specimen in the Taxon field. If the current name is on the folder but not on the sheet, a determination slip must be attached to the sheet, e.g. Anonymus: Potamogeton crispus L.
- W-Krypt: Ident: Hist.
If a specimen has not been revised or the the most recent revision is not the current name (i.e. does not match the currently accepted name in Tropicos), square brackets ”[]” are used to add additional information. The author name(s) and dates from the relevant publications where the revision was made are given. e.g.: Orig.: Bryum baenitzii; [M. F. V. Corley et al. 1982: Bryum pallescens] Loans are also added in this field as: [ON LOAN: loan number] i.e. [ON LOAN: 04aK/12].
- W: Alternative Number
The numbers of Ecklon (Ecklon & Zeyher) with a dot (e.g. 55.8) are not Collectors' numbers. The number before the dot is a locality number, the number after the dot is the collection month (in this case August). Enter the number combination in the annotation field. You can look up the locality in the text of the document “Ecklon” in “API Material”
- W: Locality
Special case - Cultivated plants: As Locality (also Nation/Altitude etc.) enter the locality of origin, as given on the label, Collector and Collection Date of the cultivated material. If collector, date, locality etc. for the original collection are known they should be entered in the Annotations.
Herbarium WU
- WU: Herbarium number
7-digit number: there are only 6 digits; insert a “0” before this number to make it 7 digits.
- WU: Taxon
Always enter the basionym of the specimen in the Taxon field
- Wu: Locality
Special case - Cultivated plants: enter original information of origin (Locality, Collector, Collecting Date etc.) as on the label; add in the Annotations field where it was cultivated and at which date the herbarium specimen was sampled, e.g. “cultum in HBV 1983-11”.
Examples

Data entry sheet for Example 1:


Data entry sheet for Example 2:


Data entry sheet for Example 3:

Observations
A click on the Observations button opens a search form for specimens / observation records.
Images
Direct access to the image archive is not available (this is intentional, as it is likely that direct handling of the archived files would lead to mistakes, such as deleted files). Therefore, this window is available as a means of communicating with the archive.
A click on the Images button opens a window for the image handling system.

You will end up here:

The window is divided into two parts:
- The general commands
These control elements are the actual means of communication. - The tabbed windows
These windows represent different approaches to process data from the archive.
General elements
Server
The field server lets you choose the server that hold the images you wish to look at.
ImportPictures
This button behaves in two different ways:
- Usually, this will force a full image import of the chosen server.
- If there are forced images, only these will be imported.
Rescan Server
The information in the tabbed views depends on the last time the server was scanned. If one suspects this to be out of date, one can issue a rescan with this button.
Image & data check
Before using this, make sure that you have selected the correct server!
You can use the institution and family-field to narrow your search, then click either on Get last Scan or Get last Scan with Faulty HerbNumbers. The result will look like this:

X missing Pics
This column tells you which database entries have the dig. image box checked, but no image in the archive. Clicking on a number will open the Edit Specimens-field.
X missing database entries
This column tells you which images have been taken, but contain no database entry. Clicking on the number will open a simple data entry sheet to enter the specimen.
X missing database checks
This column tells you for which images, entries exist that are marked checked but not dig. image. Clicking on the number will open the Edit Specimens-window.
X faulty database entries
This column tells you how many and which database entries have faulty numbers. Clicking on the name will open the Edit Specimens-form. This information is only given if requested by the right button.
Server consistency
This field shows information on the consistency of the archive and the viewer. This should be empty. If its not, contact the person in charge of the archive.

image list
This is simply a list of all the images on the chosen server.

thread logs
In the thread logs tab, you can see the messages that the archive has produced, whilst importing the images. If you pick a date, and click on List Threads all log-files from that date until today are shown.
The server usually runs the routine import at 2:30am, so there should always be a log at that time. If you want to read the messages of the log, click on the corresponding line.
If the thread log is empty when you click on it, close it and open it again, this happens often.

If there are images to be exported, where there are already images in the archive, the import will fail and leave a message in the thread log. This might look like this:

Imports that fail, have to be forced.
Forcing import
If a picture that is in the archive, should be overwritten by a new picture, this has to be done following these steps:
- First, take the new picture, move it to the import folder, and let the overnight import run. (Alternatively, the import can be triggered right away by clicking ImportPictures)
- This will fail, because there is already a picture under that name in the archive. (This step can't be skipped, because the import has to fail once by default)
- After the import has failed, look up the corresponding day in the thread log.
- All the rescans you did this way should show up as error messages in the thread logs.
- Click on each one of them, click on Yes when asked to force the import, and wait until the message pops up that it has been added.
- After all of the rescans have been added this way, click on ImportPictures, to force their import. You can refresh the thread log page. When the end date of the new thread log is no longer 1.1.1970, the import has finished. This step is mandatory, otherwise recently added images will not be imported.

Nomenclature
A click on the Nomenclature button opens a form for nomenclatural checks of the database content.
Index Kewensis and subsequent IPNI developments and scope http://www.ipni.org/IK_chronology.html
Batches
A click on the Batches button opens a form for manipulation of batches of specimens records.
Edit unsent batch
Update database for unsent batch
Create XML file for unsent batch
– Create Webimages for unsent batch – obsolete
Djatoka export for unsent batch
Bildkontrolle
Vor dem Senden des batches müssen die Bilder auf Fehler kontrolliert werden! Dazu im Explorer (Ansicht “Große Symbole”) Bilder durchgehen bezüglich:
- Rotstich → aus dem batch entfernen (Evidenz halten!)
- Überbelichtung → aus dem batch entfernen (Evidenz halten!)
- doppelte Bilder mit unterschiedlicher Nummer (Bsp: w_0047978 und w_ 0047986 - im Jacq-Viewer werden allerdings die richtigen 2 Bilder gezeigt) - Problem: für w_0047978 gibt es vermutlich 2 Bilder (Nummerierungsfehler?), aber nur das ältere (falsche) wird in den batch eingefügt!
- !!!! ACHTUNG: immer jüngstes Bild verwenden !!!
Labels
The database offers two possibilities of creating and printing labels:
Creating labels via the labels form
A click on the Labels button opens a search form for the production of labels for specimens / observation records. Available options include:
- the standard search form: This allows you to find any specimen within the database.
- the barcode label interface: By choosing your institution and entering a range of collection numbers you can print barcode labels for selected parts of the collection.
- the specimenID entry field: allowsyou to find a specimen using its specimenID.
In the list created by the search process, you can select the labels you need by ticking the corresponding boxes. Options are: Type map label (creates a folder label), Type spec label (creates a specimen label) and barcode label.
As soon as you have made your selection, you can create a printable .pdf by clicking the make PDF buttons on top of the search list. Please note that each type of label (folder/specimen/barcode/standard) has its own button.
After printing the labels please do not forget to delete your selection by clicking the Clear all button.
Creating labels via the edit specimen form
You can access the printing form by clicking the specimenID in the edit specimen form. Tick the type spec box if you need a specimen label and/or the type map box if you need a folder label. The make PDF button creates a printable file. After printing the labels do not forget to delete your selection by clicking clear all.
It is also possible to create labels for the specimens you were working on during a specific date. In the main specimens window you can access your daily work by choosing a specific date from the drop-down menu and clicking the Labels button and proceed from there. Alternatively you can download an XLS file containing the labels for a specific date by clicking the floppy disk symbol next to the Labels button.
The same procedure is available for standard (non-type) labels.
Special cases
Pro Parte synonyms:
A pro parte synonym results when a taxon is divided into two or more new taxa. The original name is retained as the accepted name of one of the new taxa and becomes the synonym of the others. It is then possible for there to be identical names (differing only in the inclusion of 'p.p.') for different taxa.
Labels for pro parte names can only be printed by the typification team and are usually added to the specimen by them. If there is no labelling option available, it is most probably because of a pro parte name. In this case type and accepted taxon are not linked on purpose, and you can find an annotation in the annotations field of the specimens form.
Import
Automatic import
After developing the pictures in the CaptureOne software, open the corresponding folder in the Explorer (e.g. 160119_01 for the first session on January 19, 2016).
Additionally, open a new Explorer window and navigate to the jacq import drive (usually z:). Create a new folder in the jacq import directory and name it after the session number you are going to develop (again: 160119_01 for the first session on January 19, 2016). Pay close attention to follow the naming conventions correctly!
Finally, copy the content from the Output folder to the newly created jacq import folder.
Note: Please do not convert more than one folder at a time.
All content of the jacq import directory will be transferred to the live server overnight. If no problems occur, the images will be available for photo control the next morning and the jacq import folder will be empty. In this case the content of the output folder of the corresponding session can be safely deleted.
Note: Please create a textfile saying “transferred_DATE” in the output folder if you delete the content.
If the jacq import folder is not empty and/or images are not properly displayed, continue with Troubleshooting and forcing images.
Manual import
In the case of a menual import please follow the steps of the automatic overnight import. After creating the appropriate folder structure, enter the database and click the “IMAGES” Button
In the images submenu pick the correct server for your institution in the dropdown menu in the top left and click “ImportPictures”. Depending on the size of your import, this step may take a while.
Troubleshooting and forcing images
If there is a picture missing or the picture shows the wrong specimen, there has been a problem with the import step.
If the picture is associated with the wrong database entry, there has been an error with the naming of the picture or there is already a picture with the corresponding number on the live server. In this case either the former existing or the newly taken image was incorrectly named.
- If the newly taken image is incorrectly named, correct the name in the corresponding CaptureOne session, delete the old image from the output folder and develop the image again.
- If the former existing image is incorrectly named, check if the CaptureOne session in which this image was taken is still available on your hard drive. If it is, correct the number and develop the image again. In any case, please contact your administrator to avoid inconsistencies in the archives.
In the case of a missing picture this may have several reasons.
- No photo was taken
- The image was not properly developed and has therefore not been transferred to the output folder.
- The image was not transferred from the output folder to the jacq import directory
- The image was not transferred from the jacq import folder to the live server. This is a technical problem and will create a thread-log entry. Please inform your administrator about this.
tbd
Digitization
This page explains the digitization process. First, the standard workflow is presented, then more detailed information on the different steps involved is given.
Workflow
This section describes the standard workflow when digitizing a specimen. Here is a chart illustrating the steps. Below, the blocks in the chart will be explained.

Preparation
Each specimen that is to be digitized enters the process via one of the inboxes.
First the workplace is prepared. For information on this, please refer to the Institution specific section. After the workplace is set up, the digitization process begins. The specimens to be digitized are to be taken from the inbox with the highest priority.
Scanning
Preparing the scanning setup
Before actual specimens are digitized, the quality of the scan has to be assured. This can involve, depending on the setup:
- Letting the lighting warm up, until its color and brightness is constant
- Making sure all unintended light sources are blocked out of the scanning room, especially sunlight.
- Taking some pre-scans to check the functionality of the scanner.
Steps, that should, in some way, always be taken, involve:
- Sticking to a regular calibration scheme
- Producing control images of the state of the scanner using e.g. grey cards.
See institution specific information for examples on how this might be done.
Taking the pictures
This section is almost entirely institution specific, as the process of taking the pictures depends entirely on the setup. While taking the pictures, please follow the filenaming-and scanning conventions.
Ending the scanning
When the digitization process is finished, make sure that all scanned specimens are filed/labeled in a way that is easily understandable for all involved. This can be done by using log-files and checklist labels.
Administrative steps
Administrative steps that are required include: Locking and freeing specimens, executing additional programs and keeping track (log files).
Locking specimens
As long as some of the digital checks are missing, the specimen should not be processed further under any circumstances. In order to guarantee this, they are “locked”. That is, they are kept in place, and not moved until the lock is lifted.
Freeing specimens
Once all digital checks are done, the specimen goes to the visual check. At this point, the lock is lifted, there is no restraint on the further processing anymore. Together with the freeing, the images have to be inserted into the archive, so they are visible in the viewer for the visual check.
Additional programs
- After the specimen has been locked, the Kew script has to be run.
- After the specimen is freed, it has to be inserted into the archive.
- other steps (institution specific)
Keeping track (log files)
In order to handle all the different threads that come together during digitization, effort to keep track of specimens should be made. This includes:
- Clearly marking the inboxes
- Clearly marking the stage in which specimens are
- Clearly marking if specimens are scanned, and which checks are done or missing.
- Organizing the scans in a folder structure (a folder per day has worked well).
- Keeping log files of all essential stages (which programs have been executed…etc.).
Digital image check
Before inserting an image into the archive, it should be checked for obvious mistakes. This involves three steps:
Filename check
Open the newly scanned folder with a list view of the specimens. According to the filenaming conventions certain characteristics have to be followed, such as:
- The prefix must be valid (look also for uppercase vs. lowercase)
- The parts (one specimen divided onto several sheets) must be separated by underscores (these are sometimes replaced with hyphens by mistake)
- The filename must have a certain number of digits. See Herbarium specific Information
- Look for fitting postfix combinations (e.g. if there is a w_188900004354_a scanned, in most cases there should also be a w_18890004354 scanned on the same day; it is rare to have the postfix _02 or higher on anything but tabulae). If any of those cases comes up, check to see whether it is a mistake or intentional.
- Sometimes, spaces are inserted by error. Look if the length of the name is aligned with the other files.
If the check was done before inserting it into the archive, it can simply be renamed. Otherwise, the case should be checked back, to clear what is to be done to the wrongly named file in the archive.
Thumbnail check
Open the newly scanned folder in thumbnail view. Look to see if the principal conditions that are necessary for a valid image are met:
- Does the scan show all necessary items (color target, scale)?
- Does the coloring seem unnatural?
- Is an image obviously cropped at the borders?
The Kew check
The final digital check is the Kew check. It is explained in further detail here. The purpose of the Kew check is to find digital errors that the scanner made. These are potentially invisible during the visual check.
Any errors that show on the thumbnail or the Kew check go back to a priority inbox. This is described in Processing of faulty images.
Visual image check
The visual image check is the last check in the digitization process. If all other checks for the specimens are made, the image that was taken is compared to the original sheet. This is to ensure, that external people opening the image get the correct visual information. Therefore, this check is only done after importing the pictures into the archive, and is made using the viewer of the database.
The check is based on a general view of the sheet (does it look the same?/ is it the same?). Pay attention to following key features:
- Is any edge of the specimen cropped, is the whole sheet visible?
- Are the necessary accessories (color target, scale) visible?
- If there is something hidden, are there additional postfixed scans?
- Is the specimen correctly labeled?
- Is there a deviation in color?
If something is unclear, it should be discussed with the relevant person. If a problem is found, the specimen reenters the process via this step. Once this check is passed, the specimen is completely digitized.
Processing of faulty images
At this step, all specimens with deficient images are collected. For these, follow these steps:
- Keep a log file, where the cases and the reasons are accounted for. If others search for the specimens, they can look in the log files.
- Search the original file on the scanning machine. If it still exists, delete it.
- Look if the image has already been inserted into the archive.
- It has not been inserted: Reenter the specimen into the scanning process as a “new scan”, no further processing is needed
- It has been inserted: Reinsert it into the the process in the rescan priority inbox.
Inserting rescans into the archive
If the image has already been inserted into the archive, the insert of the rescan will fail. After it has failed, you have to open the images window of the database, and go to the thread-logs. Choose the server where a thread log to the latest import is found. Open this thread log and click on the error message of the concerned rescan. Then confirm to force the import, and click on import pictures.
See further information under Forcing import
Information
Inboxes
Inboxes are the place from where the supply for digitization is fetched. In order for a specimen to be digitized, is has to enter one of these inboxes.
The digitization process is supplied with material to be scanned by potentially more than one source, and the supply is of varying urgency. For example, there might be a request for an image by another institution. In this case, this image is probably more urgent than other material that is to be scanned. Likewise, the control mechanisms might require an image to be scanned again, this again is to be processed in priority. On the other hand, the majority of the material will be provided with no specific priority.
A set of inboxes has to be defined. There is the regular inbox stack and there are priority inboxes.
Regular inbox stack
Most of the specimens will be equally important. These are filed in the regular inbox stack. By construction, this stack should have considerably more throughput than all the priority inboxes combined.
Priority inboxes
There are several, very different reasons, why a specimen is given priority over others:
- The image was requested by another institution
- The specimen has a faulty picture. This should be corrected as quick as possible.
- Within the global workflow, special cases pop up, which should be handled individually.
- A specimen has already been digitized, but the information on the specimen has changed since. In this case a new version of the image has to be taken and named accordingly.
- …
In general, one can say, that if there is something special about a specimen that is to be digitized, it should be prioritised. Therefore, priority inboxes for different classes of cases have to be introduced. For example:
- Inbox image requests
- Inbox rescans
- Inbox unique cases
- Inbox new scans (of already digitized specimens)
- …
These inboxes then have to be ordered according to which has the most priority. What categories the priority inboxes include, depends on the institution.
Filenaming conventions
The image file has to be saved following a strict naming convention. Otherwise the viewer will not be able to find the image corresponding to a dataset. The naming convention consists of three tokens: the prefix, the body (number) and the postfix. Every file has a prefix and body, the postfix is optional (depending on the situation).
For example the file w_0044765_01 consists of
| w | 0044765 | 01 |
| prefix | body | postfix |
The prefix, body and postfix are always seperated by underscores.
Note: Tabulae have different conventions for each part!
The prefix
The prefix usually represents the herbarium where the specimen lies.
Examples:
- w for the Herbarium Vienna
- w-krypt for the cryptogam collection in W.
- wu for the University of Vienna
- …
For tabulae, this prefix is always “tab”.
The body (number)
The body is always a number. For specimen the number consists of the acquisition number, with the following schemes:
Cases from W:
- If the acquisition number starts with a year (e.g.: 1889-3454) the number is this acquisition number, with the hyphen removed, and instead the number filled with zeros until the whole body has 11 digits: 18890003454
- if the acquisition number has 7 digits, this is left as it is.
- This results in a body that always has either 7 or 11 digits.
For tabulae, the body is the database ID. It is found in the edit specimens-page in the top left corner.
The postfix
Postfixes are not necessary for basic scans. They are required in certain circumstances. For specimens, there are two reasons for postfixes:
- Not all the information of a specimen can be made visible on one image.
- If this is the case, first a picture of the whole specimen is taken, without added a postfix.
- Then, hidden parts are made visible, and selections of those parts are scanned. For this, the prefix and body stay the same, but as a postfix, the additional scans are numbered with lowercase letters (i.e.: _a, _b, …etc.)
- Something changed on the specimen, and a new scan is required to reflect the change (i.e. the specimens returns from a loan with annotations).
- In this case, the specimen is scanned again, but with an added postfix.
- Starting with the first revision scan, the postfix _01 is added, and with further new versions, they are counted in the two digit postfix (_01, _02, _03, …)
Note that these postfixes can be stacked. So, if for example, something changed on the specimen 1889-0003454 from W in a hidden area:
- This area must already have been digitized as w_18890003454_a
- The revision scan then would be w_18890003454_a_01
- A further revision would produce w_18890003454_a_02
If there are more than one tabulae to a specimen, they are numbered using the two digit postfix (i.e. tab_000123_01, tab_000123_02, …). Should there be one of the above cases with revisions or hidden parts for tabulae, they are also numbered in the two digit postfix.
Scanning conventions
How to operate the scanning setup is dependent on how the setup actually is. These conventions however, should be followed more or less independent of the concrete setup.
Preparing the dataset
If a specimen has already been databased, always fetch the dataset when preparing the sheet. Depending on the material a quick glance or a more thorough look should be given to the correctness of the dataset. Finally, it is good practice to copy the number for the filename from the dataset, instead of taking it from the sheet (this reduces copy mistakes, but watch out for blanks). Check the dig. image checkbox of the dataset only after finishing the scan.
Preparing the sheet
The image should show as much information of the sheet as possible. For this capsules should be emptied on to the sheet, so the contents can be seen. If there is no possibility of preparing the specimen in a way that all of the information can be seen on one image (a label hides a plant, something is on the backside), multiple pictures have to be taken, so all the information is accessible (see filenaming conventions for further information). In order to facilitate extracting the information from the image, take care that the sheet is prepared in a structured way, and leave space for the color target and the scale, which are put on it on the table. For Cryptogames: if there are both vegetative and fertile parts of the specimen, make sure that they are visible.
Working on the scanning table
The time the specimen lies on the scanning table should be minimized. A color target and a scale should always be added on the specimen for reference. The color target should be placed along the left edge of the sheet, preferably in the lower corner, with the white square pointing to the lower right. The scale should be placed preferably on the right or left edge, in the middle. If there isn't enough space on the sheet place the target and/or scale next to it. After finishing the scan, mark the specimen and its folder as scanned (if necessary).
Kew check
Digital errors are barely visible to the naked eye, and are expected to be overlooked. For this reason, a script was devised at Kew to make these errors visible. This script is to be run as standard procedure on all files. This control mechanism is called the Kew check. This check generates distorted files of the original, with a hugely boosted contrast, where digital errors are easily seen.
Running the script
Open Photoshop and go to Automation → Batch execution. There, select the right script, the newly scanned files, and a valid target folder. Now just run the script, and wait until it has generated all the control images.
Checking the images
Use an Image viewer (e.g. IrfanView) to look at each of the control images separately:
- Resize the image
- Scroll up and down
Take a look at the original file for everything that looks suspicious. Since the control images are very distorted, this will be a lot in the beginning. But with a little practice, you get a feeling what is normal.
Once you have a feeling for how a good picture looks in the Kew control image, look for things that don't belong there:
- Vertical bright lines (usually very thin, indicator of a dead pixel on the scanning row)
- Horizontal bright lines (some are very thin, but they appear in every thickness)
- A flaming pattern (an indicator for problems in the coloring of the image)
- anything else that looks suspicious
If you have found something suspicious, check back with the original file whether this is truly an error, or you were mistaken. For every image that has an error, get the specimen, delete the picture, and reinsert it into the scanning process (for example into a rescan priority inbox).
Tabulae
Any sheet of paper - including photos - that is not fixed to the specimen, is called a tabula here. If there is one or more of such tabulae to a specimen, it has to be digitized on its own. Most important, is the unique naming convention for tabulae:
- A tabula always has the prefix tab.
- The body of a tabula is the specimen ID, not the acquisition number.
- Only the double-digit postfix is used (_01, …). Multiple tabulae to a specimen, new versions and hidden parts (backside) are all treated equally by numbering them in the postfix.
Tabulae need neither color targets or scales.
Institution specific Information
Herbarium W
This is a work in progress…
W: Priority Inboxes
The priority Inboxes in W are as follows(with priority):
- Unique cases (very rare)
- Loan/Image requests
- Rescans
- Scans before/after seperation
- New scans of changed material
- Regular inbox stack
W: Filenaming conventions
- The prefix for W is w. For cryptogams, it is w-krypt.
- The body has either 7 or 11 digits. If there is a year in the acquisition number, the scheme is YYYYNNNNNNN where YYYY is the year, and NNNNNNN is the acquisition number, with added zeros so the whole number always has 11 digits. If there is no year in the number, it is just NNNNNNN the acquisition number, with zeros added until it has 7 digits.
- The folder structure follows a year - day - scheme:
images\pcXX\specimens\originale\YYYY\YYMMDD (XX can be 01 or 02)
W: Mamiya-Leaf
W: Mamiya-Leaf hardware setup & working environment
Note This section is work in progess!
Note: Unlike the Pentacon Setup, the iXR/Credo setup does not need any special light conditions. There is no need to switch off any light or warm up the flashes.
Note: Please sign in at the Google Calendar for scanning and fix the time you wish to work on the scanners. There is a very tight schedule for scanning.
!! important: please do NOT personalize any settings of the software !!
W: Mamiya-Leaf day to day workflow roundup
Note: Please read the in-depth startup sequence guide if you are not familiar with the system!
- start computer and camera (see computer-startup and camera-startup)
- the latest session is loaded.
- create new session. Session naming conventions are [Date]_01 for morning and [Date]_02 for afternoon, e.g. YYMMDD_01.
- the latest session is automatically closed when a new session is started.
- set “Arbeitsfläche Stand_1” if needed (select from Menu: “Fenster / Arbeitsfläche / Stand_1”)
- delete [KameraZähler] from the “Format” panel
- check depth of focus:
- set aperture to 4
- take a picture of the focus wedge
- reduce illumination
- 2,5 marker on the focus wedge must be sharp
- set illumination back to 0 and aperture back to 22
- create LCC raw file - once per day!
- set white fader
- take pictures
- end the session:
- check whether all names fit the file naming convention
- select all pictures of the session in the CaptureOne software
- set “LCC” using the day's LCC raw file and set “Schärfe” and “Klarheit” to the “Stand_01” default. Be aware that if many pictures were taken, the LCC preset and the defaults may take a few seconds to highlight in orange.
- develop pictures as desired (siehe developing)
W: Mamiya-Leaf startup seqeuence
Note: Ensure that the camera power supply is turned off before proceding!
1) Computer startup:
- Start computer
- Wait until startup and login are completed.
- Check if Credo80 databack is visible in systemtray.
- if not check the camera status light,
- if this is off, turn on databack by clicking the switch-on button.
- if status light is still off, check the battery and replace it if necessary!
2) Camera startup:
- Switch on power supply. (This releases one flash and) the camera shutter can be heard.
- Wait ten seconds until the system is completely started
- Start CaptureOne software
- Databack quits with a beep and the camera is available from the software (status light changes from blinking to permanent)
- (Activate the camera via software to produce a testshot/picture)

3) Camera activation:
- Open the CaptureOne program
- Check if the camera is active:
- If the camera is attached and recognized correctly you'll hear a short beep.
- In the Windows command line the symbol for connected USB device is on and shows “Leaf Credo 80” as connected.
- In the CaptureOne program click the camera symbol and check the state of connection.
- If the camera is inactive:
- Check the USB cable connection.
- Check the battery of the camera.
- Check if the camera is in standby mode:
- Release camera manually to wake up from standby mode.
- If this is without result, turn back on digital release. The connection should now be established but no release of flashlights possible (the green status light on the camera body is blinking).
- Switch of power line for 20 seconds. After turning on the power again you should see a flash and the green status light on the camera should be on (not blinking). Release from the CaptureOne software should now be possible.
4) Checking the depth of focus:
Note: please do this only if the picture is not sharp!
- set up the focus wedge
- set aperture to 4
- turn on live feed (camera symbol)
- turn the focussing ring of the camera lens till the 2,5 marking on the focus wedge is sharp and clear. Be aware of the short delay between live feed and actual movement.
- set aperture back to 22
- take a picture, name it “Schärfe_(date)” and check the result
- close the CaptureOne Software. (Note: This is mandatory! using the live feed may cause problems otherwise.)
- wait for 10 seconds
- restart the CaptureOne Software
- If you can not take photos after restarting the program, shut down the computer and the power supply and restart the whole system.
5) Creating the LCC raw file
Note: this step has to be taken every day!
Note: this has to be done BEFORE any pictures are taken and WITHOUT any specimens on the table.
- set flash to 10 (on both devices).
- place the oplaine disk in front of the camera lens, take a picture and name it “LCC_(date)”
- select the picture, click the right mouse button and select “LCC erstellen”
- select the pipette tool and use it on the picture to configure the white fader
- set both flash devices back to 9,1
- restart the CaptureOne Software
- take a photo to reconfigure the flash devices
- If you can not take photos after restarting the program, shut down the computer and the power supply and restart the whole system.
6) Taking pictures
- search for the specimen in the database and copy the specimen number
- insert the number into the “Name”-field in the camera program (filenaming conventions!)
- prepare the specimen for scanning (place it on the table and add the targets)
- press the camera-symbol in the programm to release the camera and flashes
- wait for the picture to check if everything is ok
- mark the specimen as processed and put it away
7) End session:
- Select all photos except “Schärfe_(date)” and “LCC_(date)”
- Set “Schärfe” (sharpness) and “Klarheit” (clarity) to “stand_01”
- Select all photos except “Schärfe_(date)”
- Click the right mouse button and select “LCC zuweisen”. Wait till the operation has finished - be aware that there is no progress bar!
If this is not the first session of the day you have to import the LCC-RAW-File:
- Close the CaptureOne Software
- Open the capture folder of first session of the day in Windows explorer and copy/paste “LCC_(date)” to the capture folder of your current session.
- Reopen the CaptureOne Software. The “LCC_(date)” picture should now be available.
- Select the “LCC_(date)” picture, click the right mouse button and select “LCC erstellen”.
- Select all photos except “Schärfe_(date)”
- Click the right mouse button and select “LCC zuweisen”. Wait till the operation has finished - be aware that there is no progress bar!
Note: Activate from menu “Stapelverarbeitung” (upper left)!
- Select all photos except “Schärfe_(date)” and “LCC_(date)”
- click “Ausgabe” (cogwheel symbol) and check the settings:
- “Verarbeitungsvorgaben” (development settings): Format “TIFF” “8bit”
- “Ausgabeort” (ouput folder): “Output”
- click “Verarbeiten”
- wait (up to 10 sec per photo) - the cogwheel symbols on th pictures change their color from orange to gray.
8) Trash files, Jacq-Import & Backup
- Open the session folder in Windows Explorer and open “trash”. This folder contains all images deleted in your current session. Delete all unwanted images from this folder. Keep images which show technical errors (color dots etc) and report them to Heimo.
- Open the output folder of your session and copy all images
- Open the jacq-import directory and create a folder for your session. Stick to the naming conventions!
- Paste the images to the newly created folder.
- Compare number and file size of the images with the original folder to make sure everything has been copied correctly
- Convert the original images to EIP format and store them in their respective folder on the backup drive.
9) Screen calibration:
Note: this step is taken automatically every second week on Monday.
Manual calibration (if necessary):
- Open “ColorNavigator 6” on the desktop.
- Select “100cd 5800K 2,20”, which is the top entry of “Targets”.
- Click on “Adjust”.
- Check Measurement Device “CG277 Built-in(21895034)” - this is the name of the screen.
- Click on “Next”.
- Click on “Proceed”. The calibration process starts releasing the sensor in the lower left section of the monitor. The whole process lasts about 3-4 minutes.
- Wait until the sensor is back in its cover and the software switches back to target selection page.
- The lower right buttons turns to “Finish”. Click it.
- The software switches back to start screen, the lower right buttons turns to “Quit”.
10) Annotations and troubleshooting
- base settings:
- “Blende” (aperture): 22
- “Belichtung” (illumination): 1/125
- “Blitz” (flash): 9,1
- Proof Profil “AdobeRGB (1998)”
- check “Schärfung” (sharpening) - pre-setting “Stand_1”
- “Stärke” (intensity): 295
- Radius: 0,9
- “Schwellenwert” (treshold): 1,0
- check “Klarheit” (clearness) - pre-setting “Stand_1”
- Methode “Durchschlag”
- “Klarheit” (clearness): -7
- “Struktur” (structure): 36
- Specimens with more than one database entry (A,B,C,…) can be copied and renamed in the Explorer. Attention: This is a copy of the raw image and none of the adjustments (straightening, cutting etc) are applied. Always be sure to check the result of this in the CaptureOne software!
- Positioning of large-scale specimens works best via Live-Imaging. Set the aperture of the camera to 4 for live feed but remember to set it back to 22 für taking the photo!
- Low storage space message: Please contact Heimo as soon as possible!
- Most issues while taking photos can be solved by closing and re-opening the CaptureOne software. Remember that your session is saved and automatically re-opened on software restart. You can continue taking pictures without further steps.
W: Mamiya-Leaf shutdown seqeuence
- close software - databack quits with a beep.
- shut down the computer.
- shut down power supply.
- go home.
W: Pentacon Scanner
W: Setup the cameras
Information can be found on the 'cheat sheet' in the scanning room.
W: Setup calibration
- Pick the correct calibration target.
- The thin target (R080213) for PC02 (pentacon 6000)
- The thick target (R040507) for PC01 (pentacon 5000)
- Place the calibration target in the middle of the scanning table (arrows indicate the best place).
- Do a prescan of the calibration target.
- Click on the calibration button.

- You will see a mask with the structure of the target. Pull this mask in such a way, that it covers the pattern of the calibration target. (An image explaining this appears when you click the calibration button)
- Once the mask is set, click on Start. The program will perform the calibration.
- If the calibration was successful, you will be prompted to save the result. If not, you will be asked to readjust the mask.
W: Setup scan

W: Day-to-day-preperation
- Turn on all four scanning lamps, and not the room lighting.
Even if you only use one scanner, all lamps should be turned on, so the scans have a constant brightness. - Wait for about 10 minutes. Do a couple of prescans to warm up the camera.
- Create a new folder on the computer for the scanning day. (See filenaming conventions)
- Before the first scan, calibrate the scanner.
- The first scan of the day is the grey-card with the additional target.
- Start the regular scans.
W: Ending a scanning day
- Check the Thumbnail view of the day. (Does the coloring look natural, are scale and color target on every scan?)
- Are the filenames according to the filenaming conventions?
- Turn off all lamps, computers, and everything else (radio, fan, …)
W: Scanner troubleshooting
- If you have pressed a wrong button, you can undo this using the following keyboard shortcut:
While holding down Strg press the Z-key once. (Ctrl-z on an english keyboard)- Alternatively, if you have pressed BILDAUTOMATIK: You can go to Histogram, press Reset+OK, and then to Gradiationskurve and press Reset+OK
- If a program is not responding, give it enough time (5-15min) to recover before taking other measures.
- If it is still not responding, ask someone experienced.
- If the scanner is not found, quit the scanning software. Unplug and replug the scanner, and restart the software.
- If it still does not respond, reboot the computer.
W: Synchronization
- Use the FileSync program to synchronize only the scan days not processed yet.
- The target folder structure should mirror the folder structure of the scanning PC, but this should be set by default, there is usually no reason to change this.
W: Log files
There is a log sheet beside each scanner. For each scanner, write down:
- the date you start scanning
- if you have performed a calibration
- if the Kew script has been run
- if the Kew check has been made
- if the synchronization has been made.
A log file is to be found on google drive for the rescans. Fill in:
- The name and the number
- In which stage of rescanning it is found
- why it is to be rescanned
W-Krypt: Saving convention
Images are copied to an internal server at the end of a scanning day.
General Workflow in Botanical Collections
The following pages illustrate the workflows relevant for botanical collection events, manipulation and collections management.

diagram 1: visualized workflow steps identified (draft) link
GPI Workflow at W
Restoration
Before databasing, all specimens must be restored to the herbarium's standard. All specimens are screened by experienced project members and sorted into:
- No restoration needed: The specimen is passed on for databasing [Link]
- No Herbarium number on the sheet: The specimen has to be stamped before databasing. If unsure, contact the collections manager (Brigitte Friedrich) to choose the correct stamp.
- Basic restoration needed (e.g. capsule): Restore if already introduced to restoration techniques at W. If not, pass the specimen on to an experienced project member.
- Full Restoration needed: Pass the specimen on to Mrs. Stieglitz.
- The specimen contains several species or collections: It must be examined by the curator of the concerned collection (Dr. Vitek for Phanerogams / Dr. Igersheim for Cryptogams). ONLY the curator decides whether a specimen is split or not.
Important: If you work on a box of material at W and some of the specimens require full restoration and/or examination by a curator, do NOT insert the box into the next step of the workflow until those specimens are returned to you. GPI Boxes at W always contain material that belongs together. NEVER remove specimens from their batch.
Special case: Specimens before splitting: A specimen designated for splitting by one of the curators is scanned in its original state before being split. After running through the normal workflow, the respective specimens are scanned again; the original scan is saved under [Originalherbariumnumber_a]. Both the database entry as well as the specimen itself must be annotated with detailed information on the original specimen. e.g.:
W-Rchb0020461, W-Rchb1889-0278259 originally mounted on the same sheet (W-Rchb1889-0278259)
Databasing
To enter a new specimen in the virtual herbarium, click on the Specimens button in the main menu and follow the specimen workflow.
Information on all the fields of the edit Specimen window can be found here.
Be sure to check the herbarium specific information for the databasing rules specific to W.
Typification & Taxonomy
For detailed information on the taxonomy and typification steps, please refer to the Typification and Taxonomy manual.
Labeling
Controlling the database entry:
Before labelling, check the database entry for errors. This should never be done by the same person that already databased the specimen. Pay close attention to:
- Main window:
- Herbarium number
- Collector & collection number
- Type information
- end of ident history = acc. taxon?
- series & series number
- Type window (Click T)
- Type status
- Type entry refers to the correct name. Attention: A specimen can have multiple type entries (Type for genus & species, species & variety etc.)
- Taxonomy window (click the type name)
- Literature has to be available for the type name (may be missing for acc. taxon)
- Literature: Edit index: multi: if there is more than one literature entry, ask the typification team (Lia Pignotti/Johannes Walter/Pedro Escobar Garcia/Karen Martinez) to verify the entry.
- Taxon: Taxon must be accepted (acc.). If it is a synonym (syn.) check the link to the accepted taxon below. If you come across any errors in the Taxon form, always contact the typification team.
Labelling
Only print labels if they contain information missing on the specimen. All the information in the database entry (except Literature) has to be on the specimen too!
You can access the printing window by clicking the specimenID in the edit Specimen window. Tick the “type spec” box for a specimen label and/or the “type map” box for a folder label. The “make pdf” button creates a printable file. After printing the labels do not forget to delete your selection by clicking “clear all”.
Attention: The database always creates a label for every typification entry made for the specimen. Be sure to attach only labels to the specimen, which do not contain information already present on earlier labels.
Attention: Specimens can be the type of more than just a species (e.g. genus & species, species & veriety). In this case both typifications need labels both on the specimen and the folder.
Attention: Do not put the different types of a species (e.g. holo- and paratype) into the same folder but create different folders (and thus, different folder labels) for every kind of type (except for those from W-Krypt which are kept together).
The same procedure is available for standard (non-type) labels but this is currently not used in W. Non-type specimens have to be annotated by the typification team.
Specimen labels
Arrange specimen labels in the lower right corner of the specimen and above the last revision label. Glue the label on the right-hand edge and stick it to within ~5 mm from the border of the herbarium sheet. If you do not find enough space and/or the the label would cover plant parts, choose an appropriate area as close as possible to previous revision labels. Always make sure that the labels do not cover parts of the plant (especially flowers and leaves).
Folder labels
All type specimens in W are put into red folders (except for cryptogams, which are kept in blue folders with handwritten labels). Always stick folder labels to the lower left corner of the folder. Some information has to be added to the folder labels manually:
- Number of specimens in the folder
- Family (lower left corner of the label)
- indicate the appropriate name under which the specimen should be re-inserted into the collection, by marking it with a small arrow (→). At W, specimens only change their location, if the genus of the accepted taxon changes.
Special cases
Pro Parte names:
Labels for pro parte names can only be printed by the typification team and are usually added to the specimen by them. If there is no labelling option available, it is most probably because of a pro parte name. In this case type and accepted taxon are not linked on purpose, and you can find an annotation in the annotations field of the specimens window.
Non-types in the type project:
In the GPI project only possible type specimens are pulled and databased. If during typification a specimen turns out not to be a type, the sheet is marked with a small τ (Tau, Greek: ταυ) to indicate it has already been examined, and annotated manually with the accepted taxon.
If the specimen has not been designated as a type before, it is put in a blue folder, annotated with the accepted taxon and family, and it is usually scanned.
If the specimen does have a typification label from earlier revisions and this turns out to be an error, the new typification must be “no typus” and a corresponding label must be added to the sheet and the folder. The specimen remains in a red folder and is treated like a type nontheless.
Sources of error during label creation
Always double-check the content of the label before attaching it to the sheet. Common errors include:
- Wrong accepted name noted on the label. This is most problably due to wrong handling of pro parte synonyms.
- Type label for a genus name shows synonymy of the genus name to a species name. This is a limitation of the database and has to be corrected manually. Open the edit Specimen window of the relevant specimen, and change the taxon entry to the name the synonymy entry on the label should actually point to. Now print the label. Afterwards, do not forget to change the taxon entry back to the correct name.
Digitization
Please follow the general digitization workflow.
Be sure to check the herbarium specific information for special digitization rules at W.
Re-Insertion
After the visual image check, the specimen is returned to its folder. As soon as the visual check of a GPI box is complete, sort the specimens within the box according to their families. Within a family the specimens are sorted alphabetically.
Note: In W, type material is always filed under the type name, except if the genus name changes, in which case it is filed under the new determination (Cryptogams are always filed under the basionym). If a specimen is type for more than one species / genus, it is filed under the same name as in the database.
As soon as a box is fully sorted, it is placed in the freezer for disinfection. From there the collection manager takes over the inserenda.
Suggested workflow for digitization on demand
This is a work in progress…
Digitization on demand
Image and/or loan requests from other institutions create a separate cycle following the general workflow. To ensure that this cycle does not interfere with the general processes within the project, it is highly recommended to define a specific “Loans” workflow to ensure that loans are dealt with rapidly and not lost amongst the general specimens.
Preparation
Adaption of the request
The first step is to decide how the request will be dealt with:
Adaption as a loan request
In this case every specimen of the requested taxa is pulled and given to the typification team, who then identify possible types and separate them from the rest of the requested material. Non-type material will be marked as part of the loan and kept separately till the end of the digitization cycle, but will not be processed any further. The type specimens defined by the typification team are inserted into the main workflow in a “Loans” box.
*special case*
In some cases the entire loan will be scanned. This decision is up to the curator concernd and/or the project manager.
Adaption as an image request
If the physical specimens are not requested but just images, only the type material is pulled and processed for the database.
Preparing the search
Checking the GPI database
If the requested material is already present in The Virtual herbarium, provide the requesting institution with the corresponding link(s). The request can then be filed.
Checking the loans database
In some cases the requested material may already be on loan, which makes searching redundant. In this case inform the requesting institution about the return date of the current loan. It may also be that the material has just returned from a loan and is currently being restored or is in the process of refiling. Inform the collections manager about the new loan request.
Checking the NOT FOUND folder
Whenever a requested specimen is not found, the request is filed in the NOT FOUND folder under the specimen's basionym and the date of request. There you can find the information provided in earlier requests and all previous efforts to locate it. This may help you make the search process more efficient.
Checking accessibility
It is possible that a guest to the herbarium is currently working with the material you have received a loan request for. In this case the taxa are currently inaccessible and unavailable for loan. Inform the requesting institution about the situation and delay processing the request until the material is available.
Checking the List Of Losses
In many herbaria specimens have been lost or destroyed during wars, especially during WWII, or other disasters. There is usually a list of specimens known to be destroyed. If the requested material is found on that list, do a quick check to see if any material may have survived, as a precautionary measure. If there is nothing left, inform the requesting institution that the material was destroyed.
Checking synonymy and type information
Depending on the filing system of your herbarium and the information provided by the requesting institution, you may have to do further research for synonyms and/of other information to help find the requested specimen (e.g. location, if your herbarium files specimens based on the continent they were collected on) For basic synonym research check The Plant List and Tropicos.
If the type information on the request is insufficient / not provided:
* contact the requesting institution.
Ask the person requesting material for complete type information, including the literature reference. If no literature reference is provided and it cannot be found easily, the request is not processed.
* check the literature reference.
The type information provided may be insufficient or even simply wrong. ALWAYS check the literature reference. It may also point you to additional (para-, syn-)types of the taxon which were not requested but could also be pulled from the herbarium and processed.
Fetching the specimen
If the specimen is found contact the requesting institution and insert the specimen into the main workflow.
If the specimen is not found:
* discuss this with the respective curator and/or the collection manager.
The specimen may be filed in another location or be currently unavailable due to restoration etc. The literature reference may also be wrong and the material not present in your herbarium.
* discuss the case in the project meeting.
The requested specimen may be part of the material one of your team members currently is working with. If the specimen cannot be found at all, discuss how to proceed further with your project manager and contact the requesting institution.
Contacting the requesting institution
If the specimen is found, inform the requesting institution about their request being currenty processed.
If the specimen is not found, provide a list of all previously made efforts (especially a list of already searched synonyms) and ask for any further information that could help locating the specimen.
If the specimen is not found despite combined efforts, the request is marked “Not found” and filed.
Inserting and extracting the specimen into/from the main workflow
All specimens which go through the digitization on demand cycle, enter the main workflow at the restoration step. They then follow the general workflow, but are given priority over the other type material being processed.
Specimens in the digitization on demand cycle should always be clearly marked as such and always carry the loans officer´s name.
After image control, digitization on demand specimens are extracted from the main workflow and returned to the loans officer.
Finishing & filing the request
Merging type specimens with the rest of the loan (Optional)
If the request was dealt with as a loans request, the processed type specimens are now merged again with the other unprocessed non-type material requested. They are then handed on to the curator to be sent.
Answering the image request
The requesting institution is sent a direct link to the requested specimen in the Virtual Herbarium. If there are no further questions or comments, the specimen is re-inserted into the collection.
Filing the request
File both online conversations and printed mails into the appropriate folders.
If the specimen was not found, file all the information the requesting institution provided and also describe the efforts made to locate the specimen. Mark the file as NOT FOUND. Deposit the file into the NOT FOUND folder.
Loan returns
Specimens that were on loan will most probably come back with new annotations and/or determinations. Make sure that this additional data is properly added to the database. This may also mean that the specimen has to be rescanned.
Install JACQ system
HOWTO setup JACQ on your system
This setup uses the Debian Wheezy (64-bit) Linux OS.
Start with a clean OS install (e.g. Debian 7.8 64-bit)
# automatically download and install important security updates
sudo apt-get update
sudo apt-get upgrade
sudo apt-get install unattended-upgrades
sudo dpkg-reconfigure -plow unattended-upgrades
# download and install needed packages
sudo apt-get install apache2 php5 libapache2-mod-php5 mysql-server mysql-client php5-mysql phpmyadmin git curl
# download Jacq source code from sourceforge
cd /var/www/
git clone git://git.code.sf.net/p/jacq/legacy jacq
git clone git://git.code.sf.net/p/jacq/code jacq-yii
# download some Jacq configuration files
cd /var/tmp/
curl -O http://ww2.bgbm.org/temp/jacq_to_go.tar
tar -xvf jacq_to_go.tar
mv install.php /var/www/jacq/input/install.php
mv in_variables.php /var/www/jacq/input/inc/variables.php
mv out_variables.php /var/www/jacq/output/inc/variables.php
cat herbarinput.sql | mysql -uroot -p (# use password from mysql setup)
cat herbarinput_log.sql | mysql -uroot -p (# use password from mysql setup)
cat /var/www/jacq-yii/docs/database/jacq_input.sql | mysql -uroot -p (# use password from mysql setup)
cat /var/www/jacq-yii/docs/database/jacq_input_organisation.sql| mysql -uroot -p jacq_input (# use password from mysql setup)
Please edit and change the mysql settings to your mysql user password
- /var/www/jacq/input/inc/variables.php
- /var/www/jacq/output/inc/variables.php
Open the URL http://YourIPAddress/jacq/input/install.php to create the first user.
You should now be able to access the Jacq system via
- http://IPAddress/jacq/input for datainput (Login: user and password added in the last step)
- http://IPAddress/jacq/output for search interface
You can find more information about working with the JACQ system here Data Input and Manipulation in the JACQ System
Donwload JACQ as a VM
You can download the system as an Open Virtualization Format (OVF) appliance here:
Please unpack the file.
Import the ova file for example in VMWarePlayer, Virtualbox more infos about ova.
After importing the appliance and starting the virtual maschine you sholud be able to start working with the system.
If you receive the following error
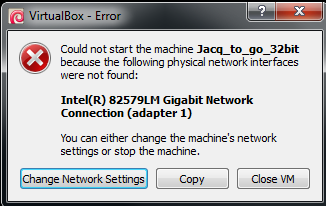
click on «Change Network Settings» and in the next window
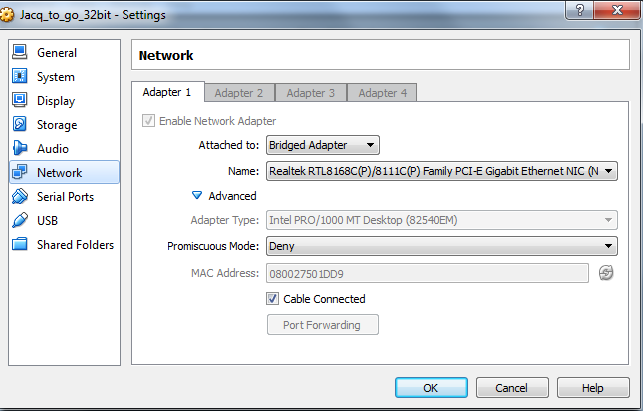
click on «OK»
For “root” the password is “Passw0rd”.
The systems tries to get an IP via DHCP. So please check the IP with ifconfig within the running sytem.
You should now be able to access the Jacq system via
- http://IPAddress/jacq/input for datainput (Login: admin/admin)
- http://IPAddress/jacq/output for search interface
You can find more information about working with the JACQ system here Data Input and Manipulation in the JACQ System
Introduction
The JACQ documentation wiki shall help with all data input and data manipulation workflows inside the JACQ system.
